

So, you would like to build a website huh?
Well, welcome to the 21st century.
Today, if you don’t have a website, it’s like you don’t exist.
I want to tell you that you came here in the right time, because, a few years ago, it was almost impossible to build a website / landing page by yourself and you were forced to hire an experienced web developer for this job.
Obviously, the cost to hire such a developer varies from a few hundreds to a few thousands.
With this tutorial that I will show you right now, you will be able to build your own website / landing page by yourself. From the bottom to the top. From scratch to full a stunning design which will be responsive and will display beautifully on any screen size.
How Much Will It Cost Me?
That is a good question. The answer for that is even better.
It will only cost you from $10 to 100$ a year, depends on your desired plan. Obviously, when you sign up for a longer period of time you’ll get more bang for your buck.
What Are The Requirement To Make A Website?
Not much. You will only need to have a hosting company and register a domain name. The best part is that you can do these two steps in one shot.
I will direct you step by step through this whole process. Just follow closely and you will be ready to start in no time. If you have any questions, email me and I’ll be happy to help you: support@wproyalty.com
Ok, So How Do I Build A Website?
We are going to start right away, but first let’s divide it to 4 easy steps:
- Finding a hosting company
- Register a domain name
- Install WordPress
- Create the website
Step 1 and 2: Hosting Company + Register A Domain Name
As I mentioned above, the first two steps we can do in one shot and we are going to use Hostgator for this mission.
So, the first step is to go to HostGator and choose web hosting.
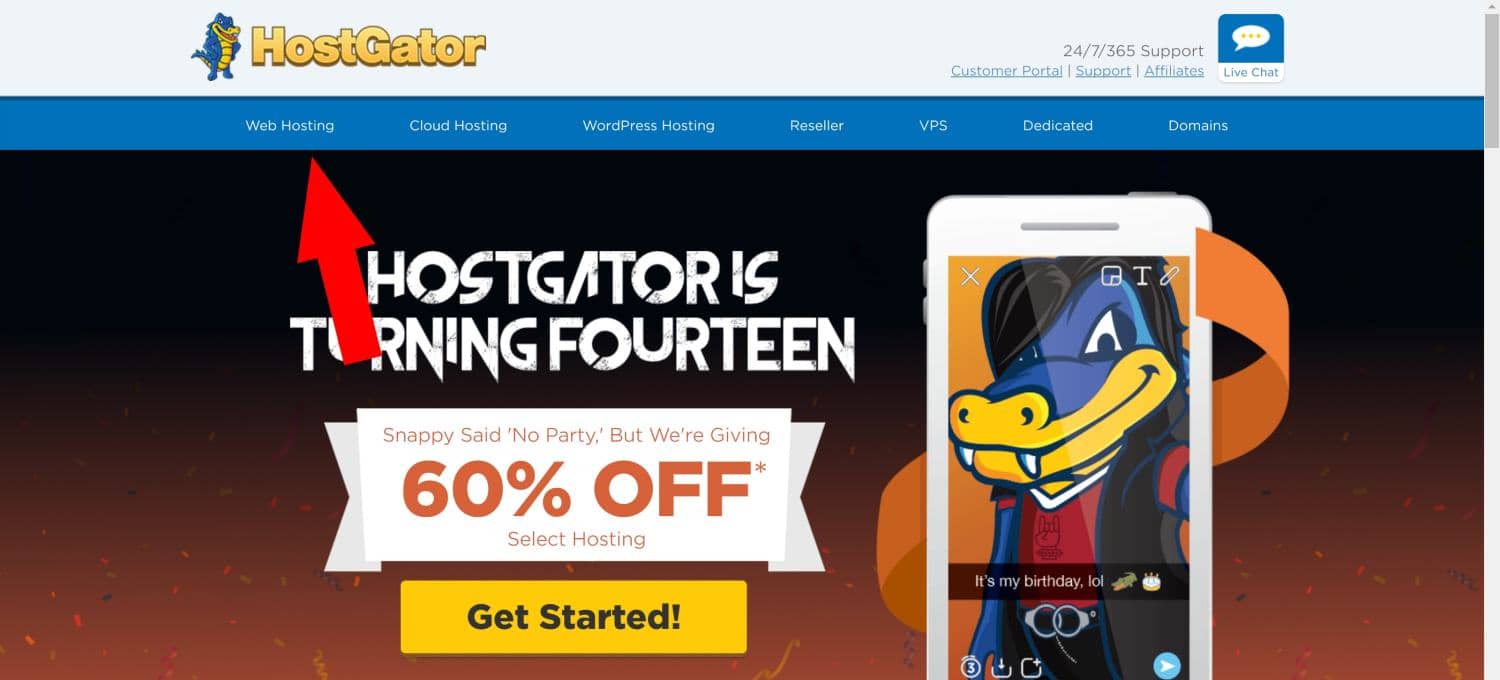
Then, you will see three plan options: ‘Hatchling’, ‘Baby’ and ‘Business’. The different between them is the amount of domains that you can register under your account.
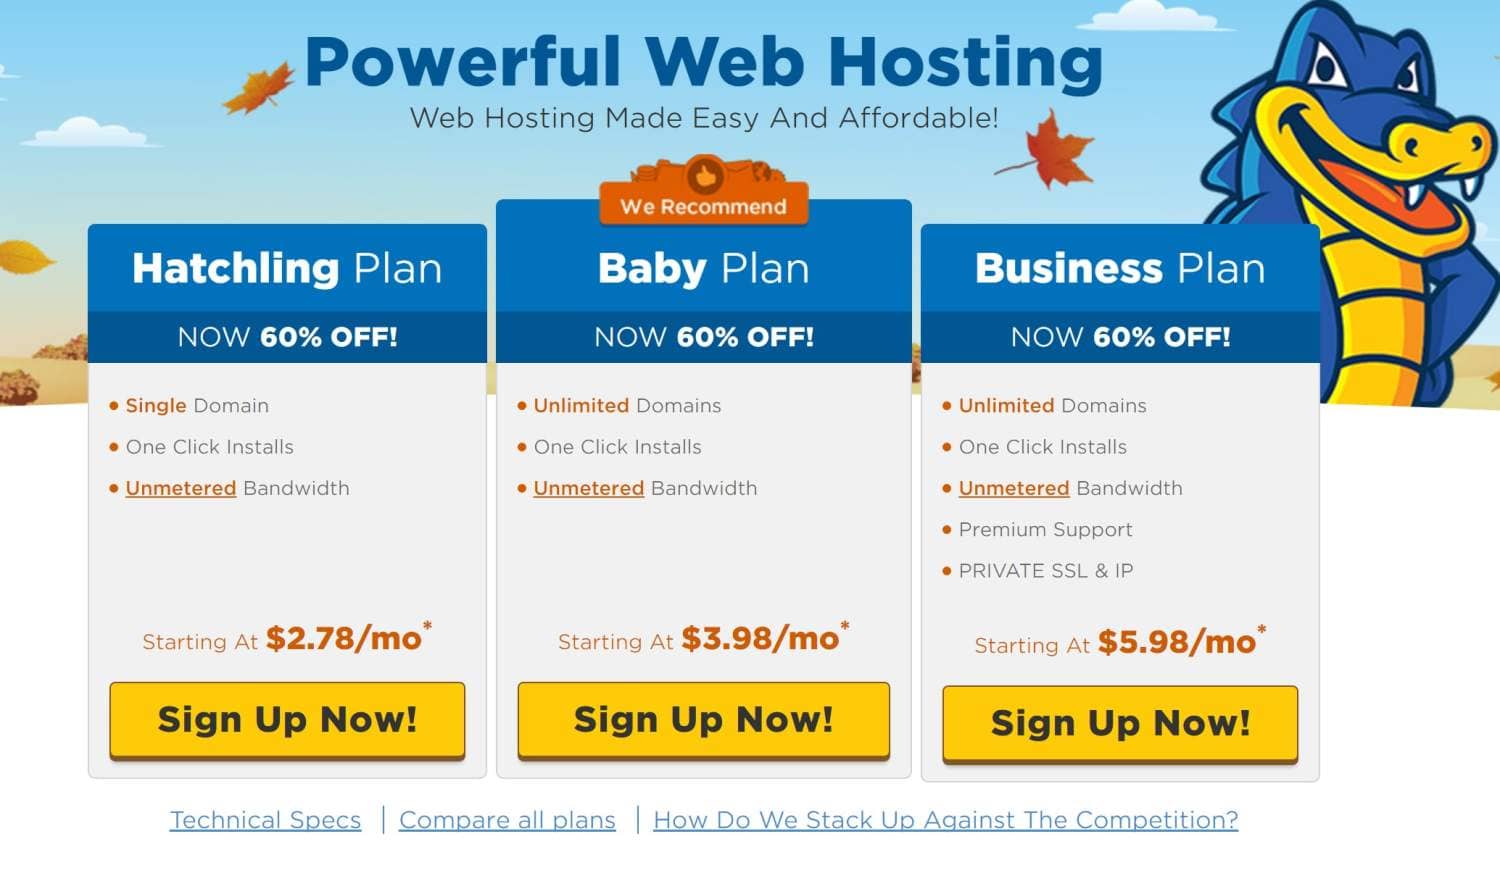
I recommend choosing the Hatchling or the Baby plans because you can start small and upgrade when or if needed.
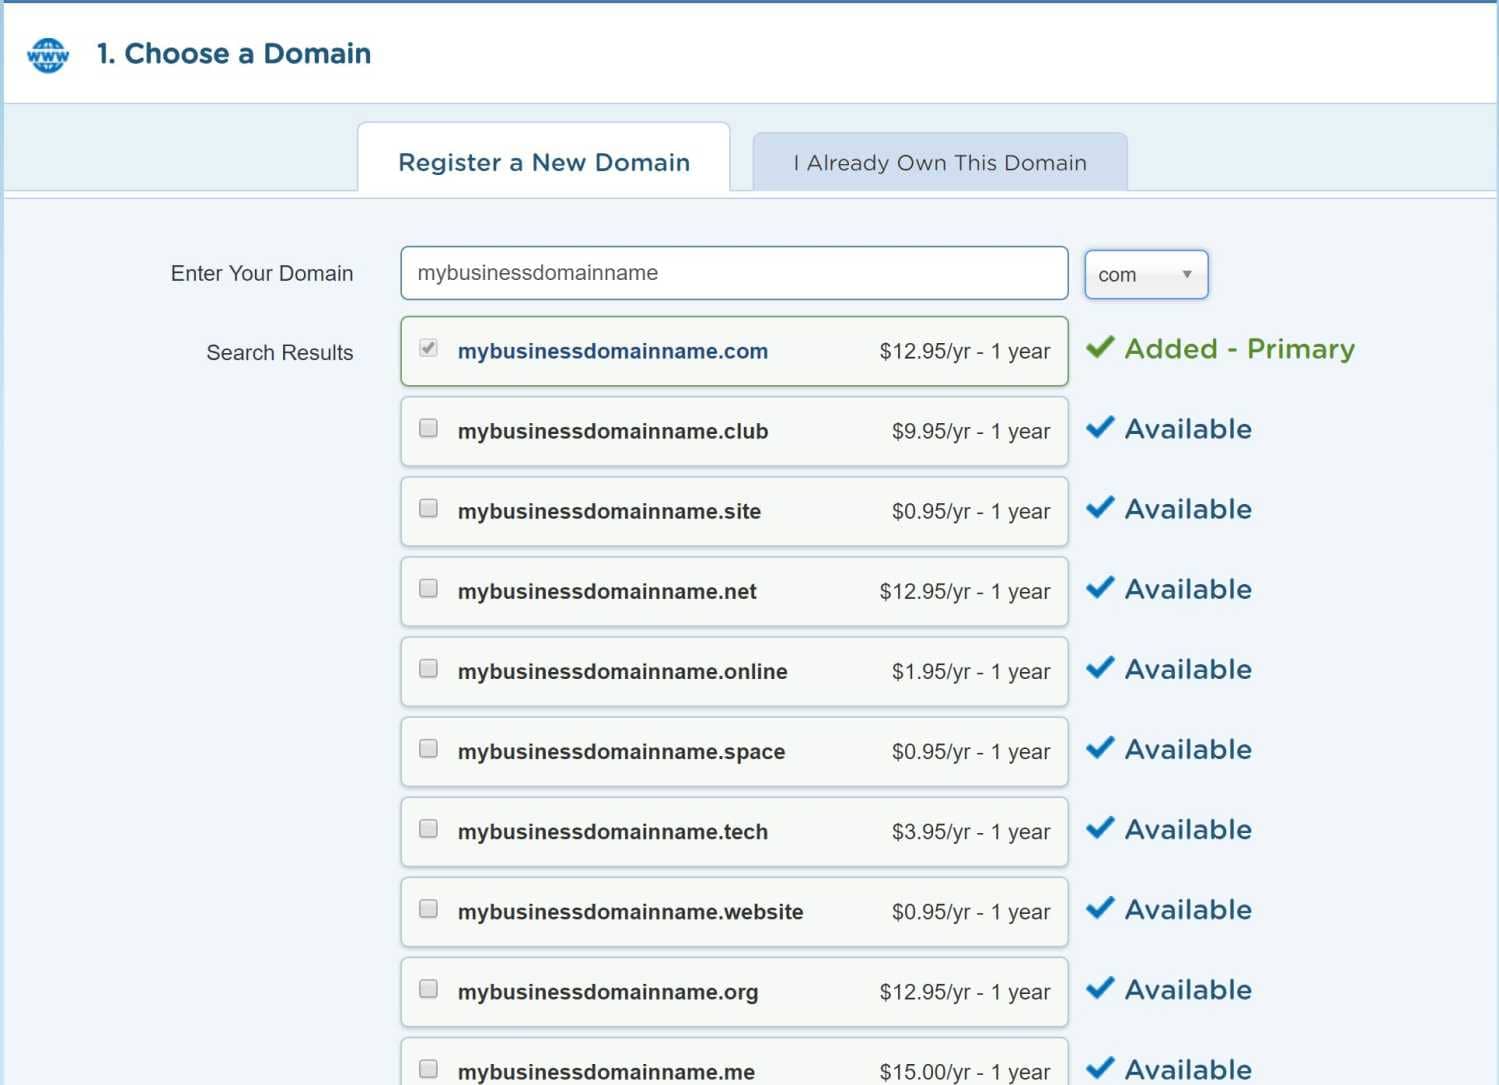
On the next screen you will be able to look and choose a domain name.
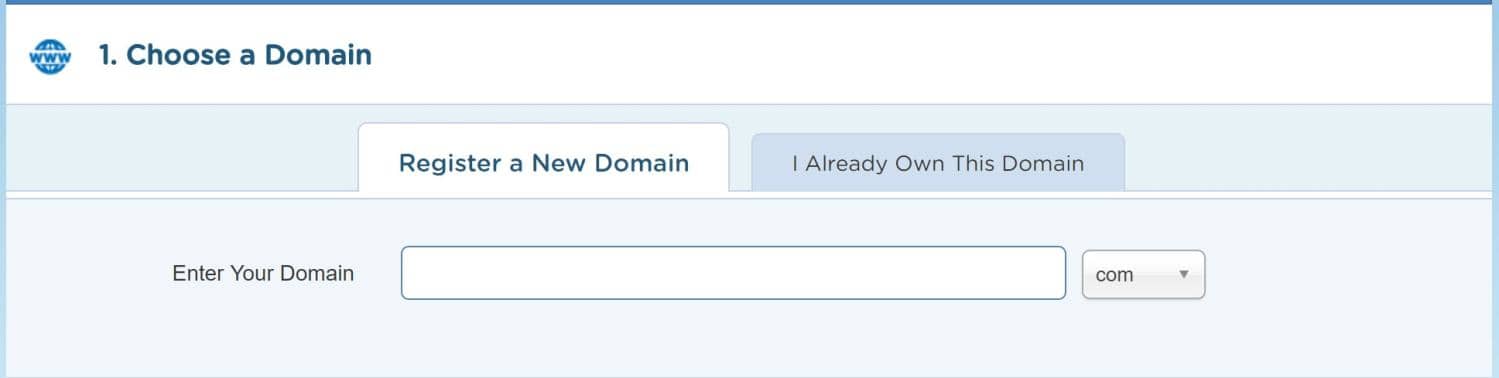
It may take you several tries to find your desired domain name but think creatively and you will get there.
Notice that you also have the option to choose a different prefix such .io .tv .info and etc along with .com.
Great, after you found your domain, we can scroll down and decide whether you would like to check or unchecked the Domain Privacy Protection.

If you check this box, your private information won’t be available when looking up your domain. It will cost you $12.95 for the whole year but you may find it worthy.
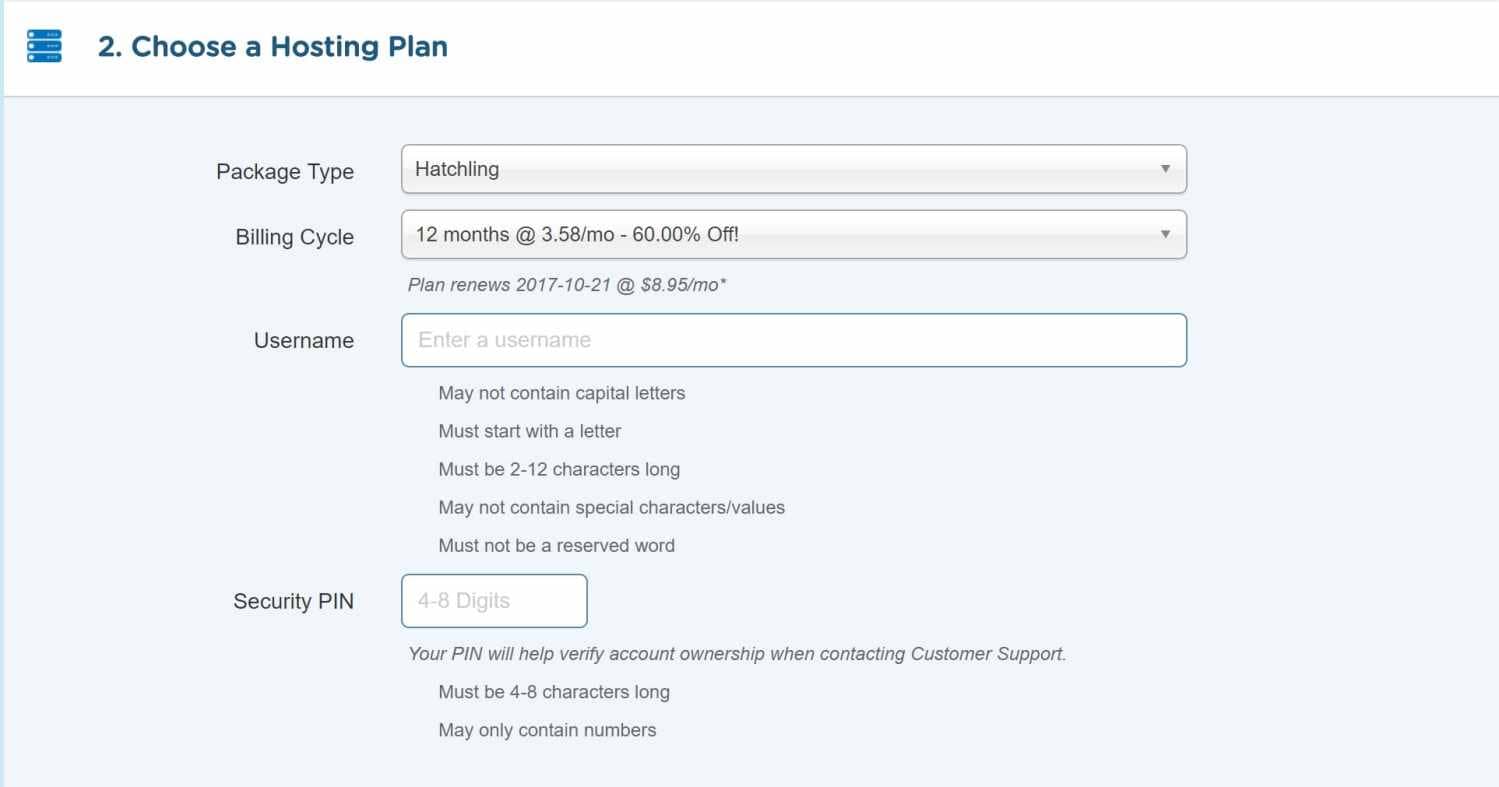
On section 2, under ‘Choose a Hosting Plan’ just make sure that the Package Type shows the plan that you chose earlier.
Billing Cycle: choose to pay month by month or a longer period to save some extra money.
Choose a username that will be used to login to the Hostgator control panel and create a security pin that will help verify account ownership when contacting Customer Support.
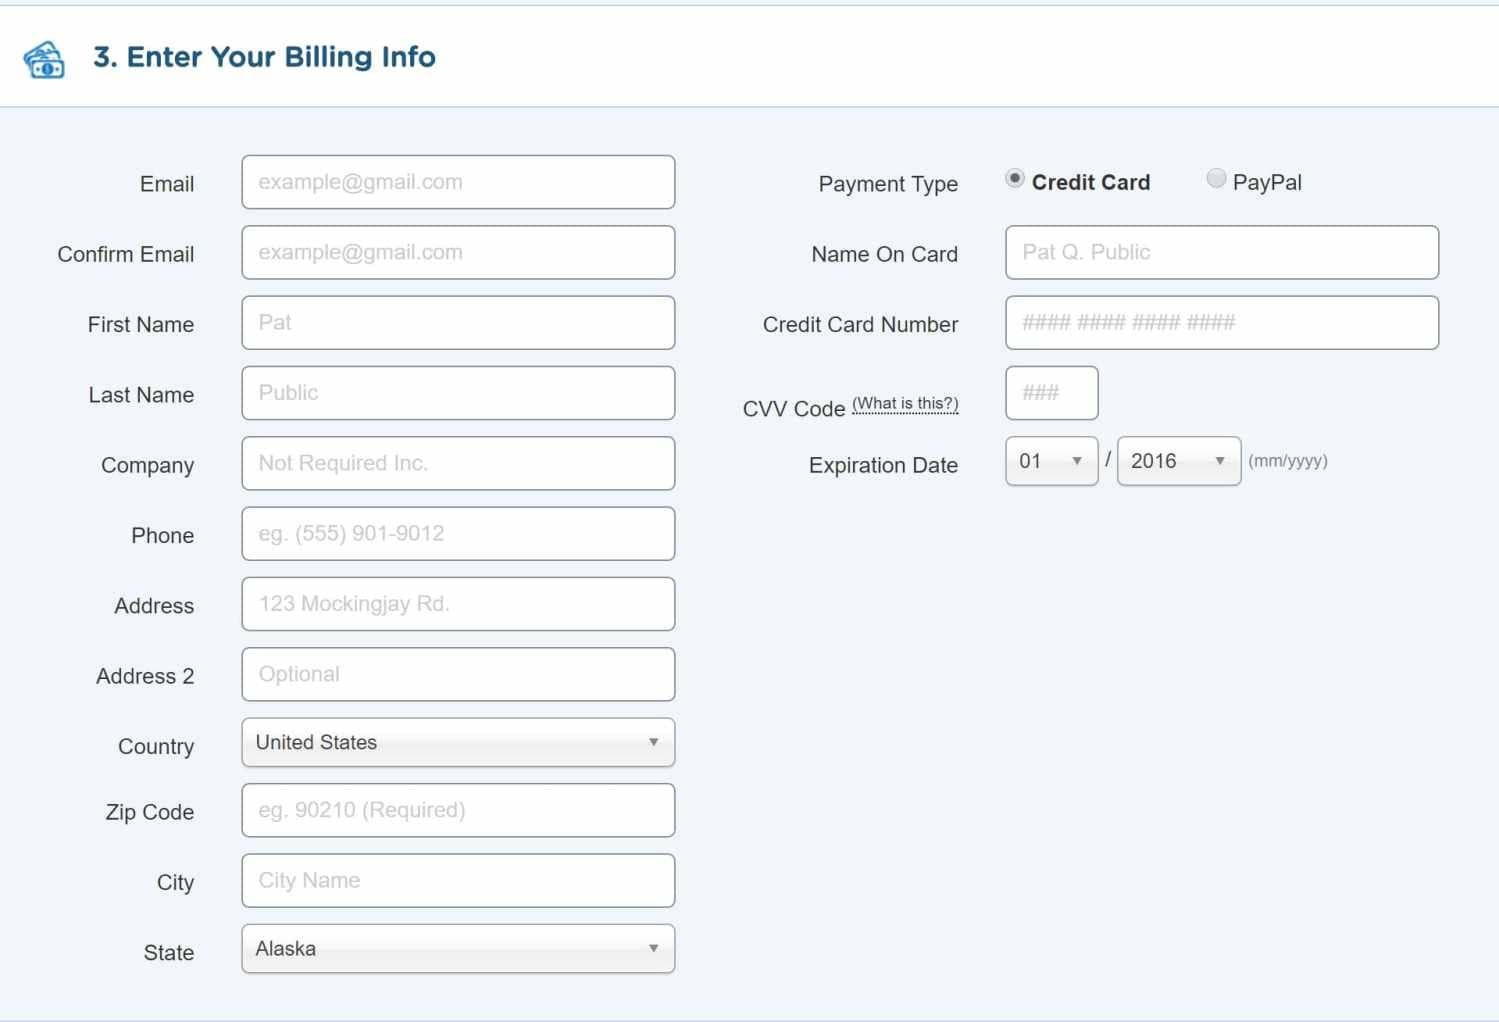
On section number 3 you will need to fill out your billing information and choose whether to pay with a credit card or paypal.
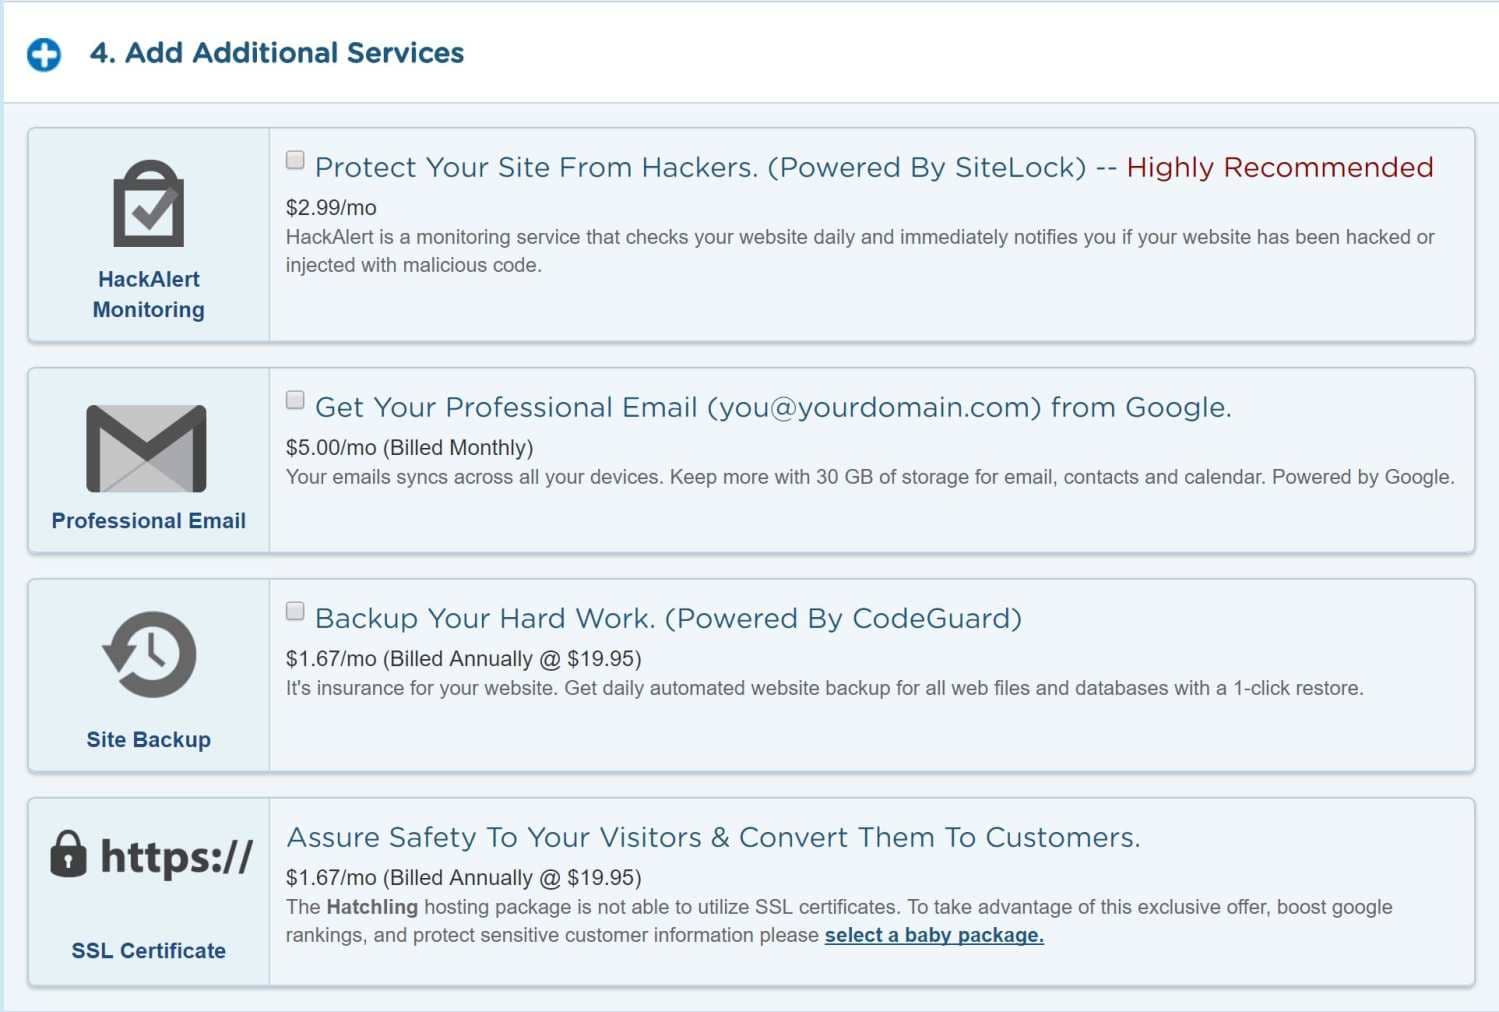
On section number 4 you can choose whether or not to add additional services like site protection and site backup. All of these services can be added up later on so feel free to unchecked them.
Enter These Coupon Codes To Save Money
On section number 5 you can enter a coupon code and save money by doing so. If you decided to go month by month use the code ‘WP1PENNY’ to get the first hosting month for only 1 penny. YES! 1 PENNY!
If you decided to go with a 3 months plan and up, use the code ‘WP25OFF’ to save 25% off on you hosting total price.

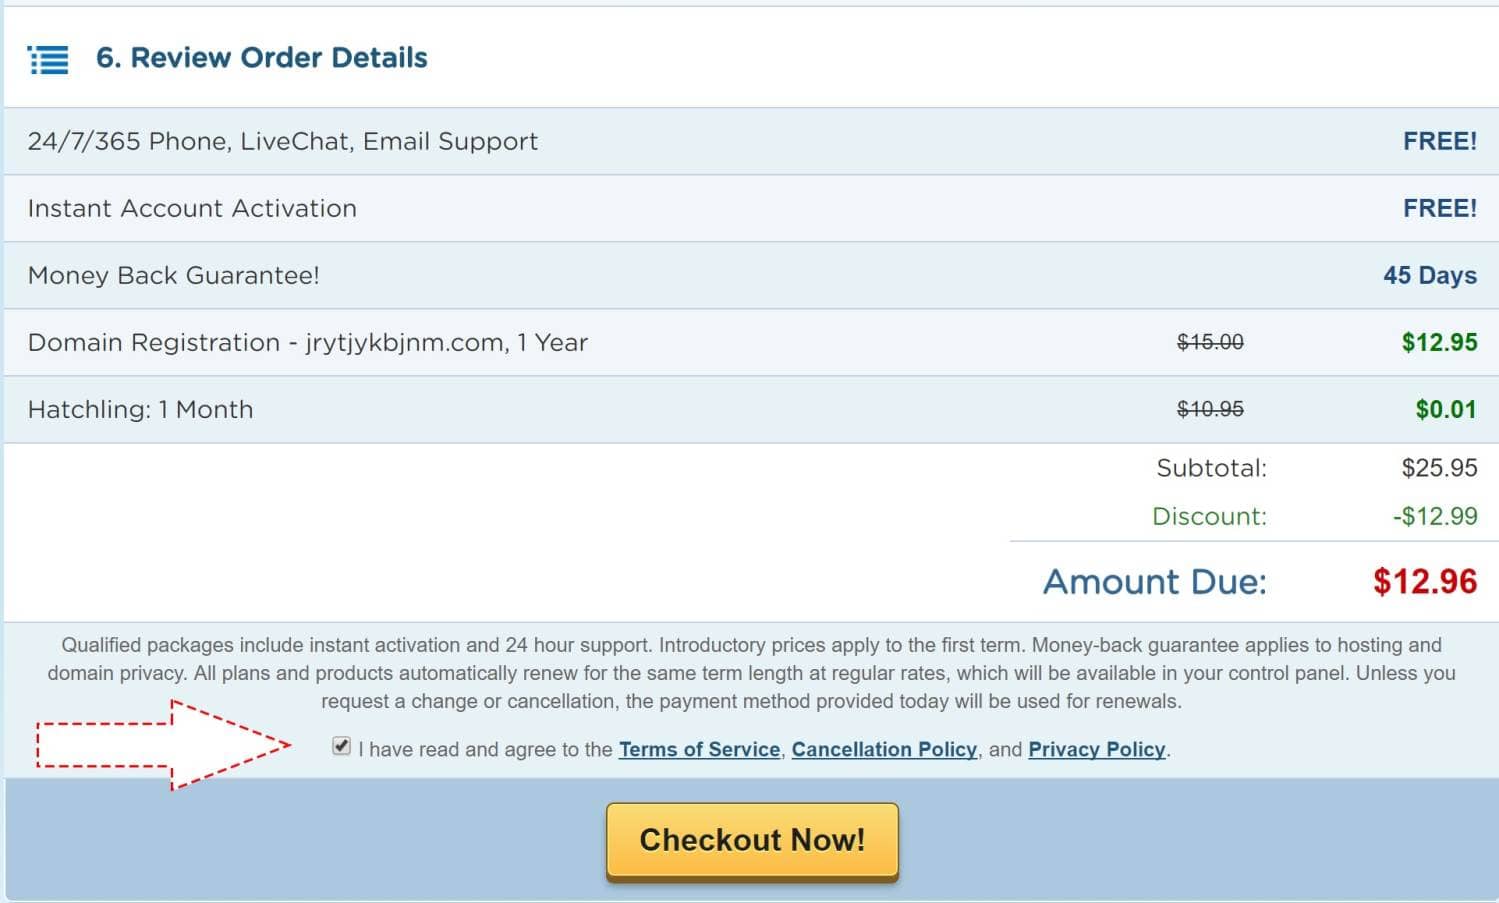
In in the last section, which is section number 6, you only need to review your order. Check the box above the checkout button and click on the checkout button.
Great, we just finished step 1 and step 2. We found a hosting company and we registered our domain name. Let’s move forward.
Step 3: Install WordPress
WordPress is very adjustable and you can customize it as you wish.
As a matter of fact, WordPress is the most popular CMS platform and it has been used by verities of users, from small home businesses to mega companies like Macy’s.
Some of the advantages that WordPress have are themes and plugins.
Thanks to them, you can design and build your landing page from scratch without any tehnical knowledge and writing codes.
Ok, Let’s Install WordPress
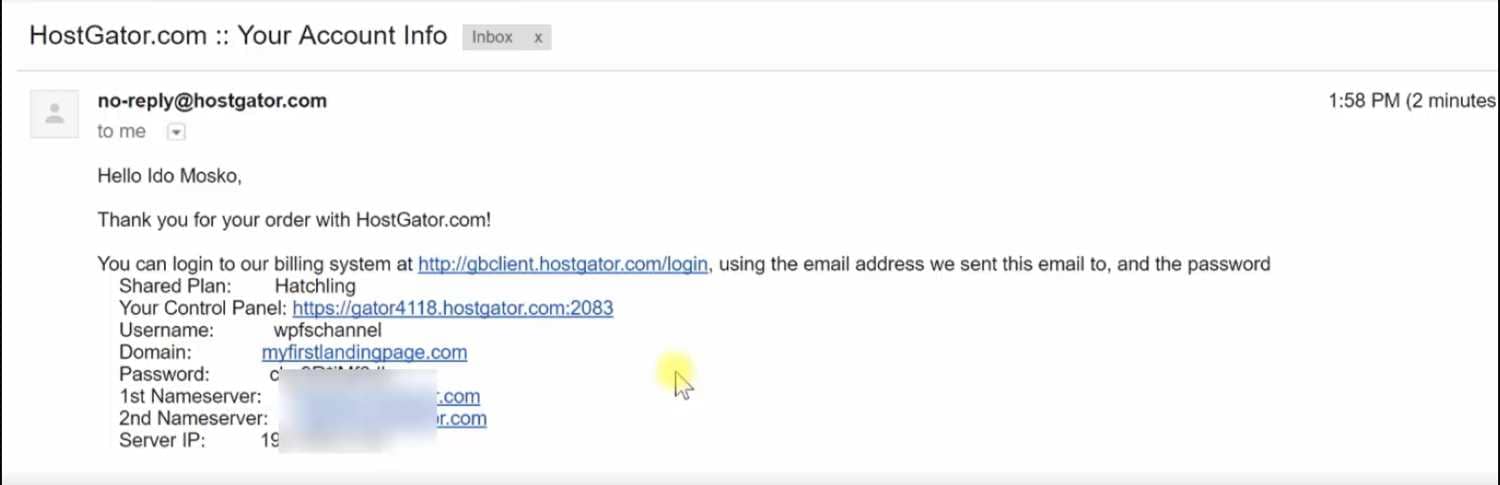
Go to your email address and open the mail that HostGator sent you after you finished the registration process.
Inside the email you will find a link to your HostGator dashboard account along with your credential such as your username and password.
Click on the dashboard link and login to your dashboard using your credential.
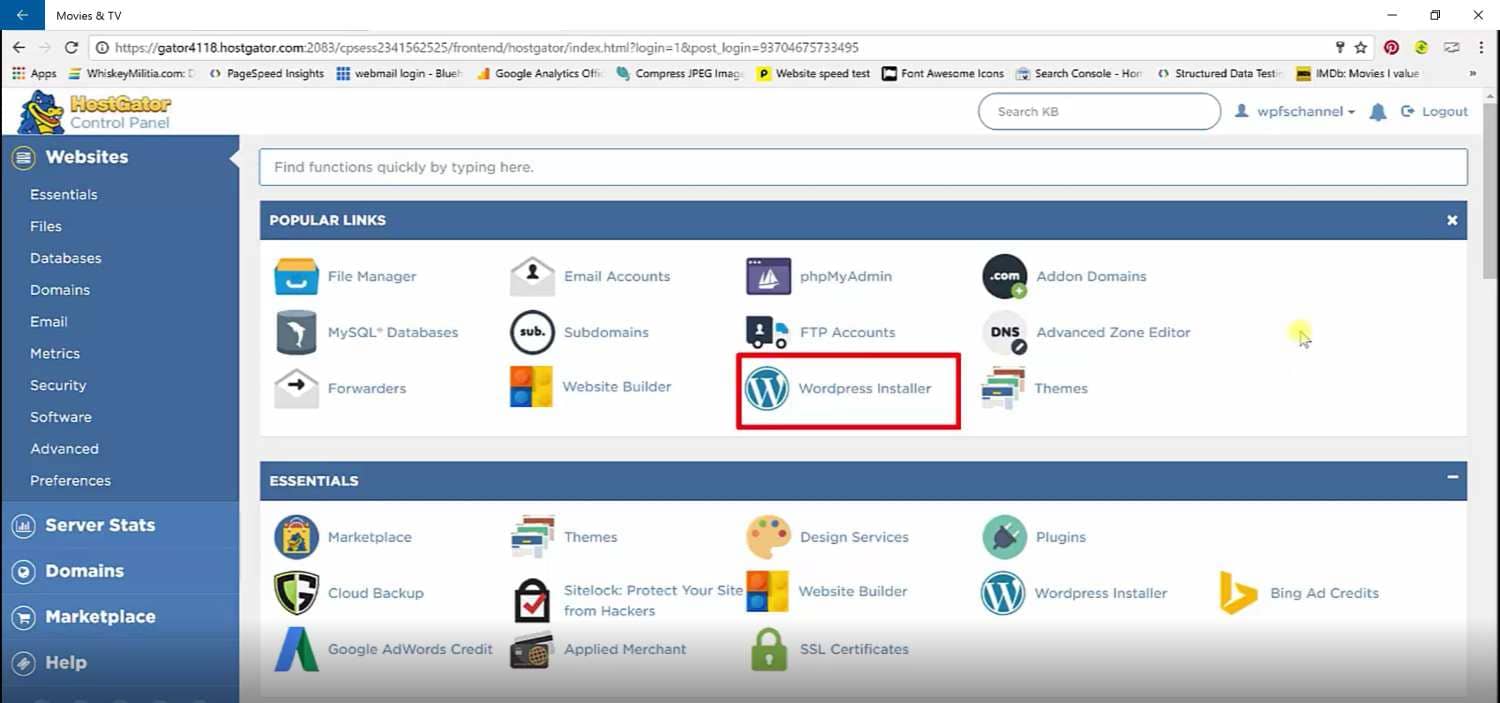
Inside your dashboard panel, you have ‘WordPress Installer’ link. Click on it.
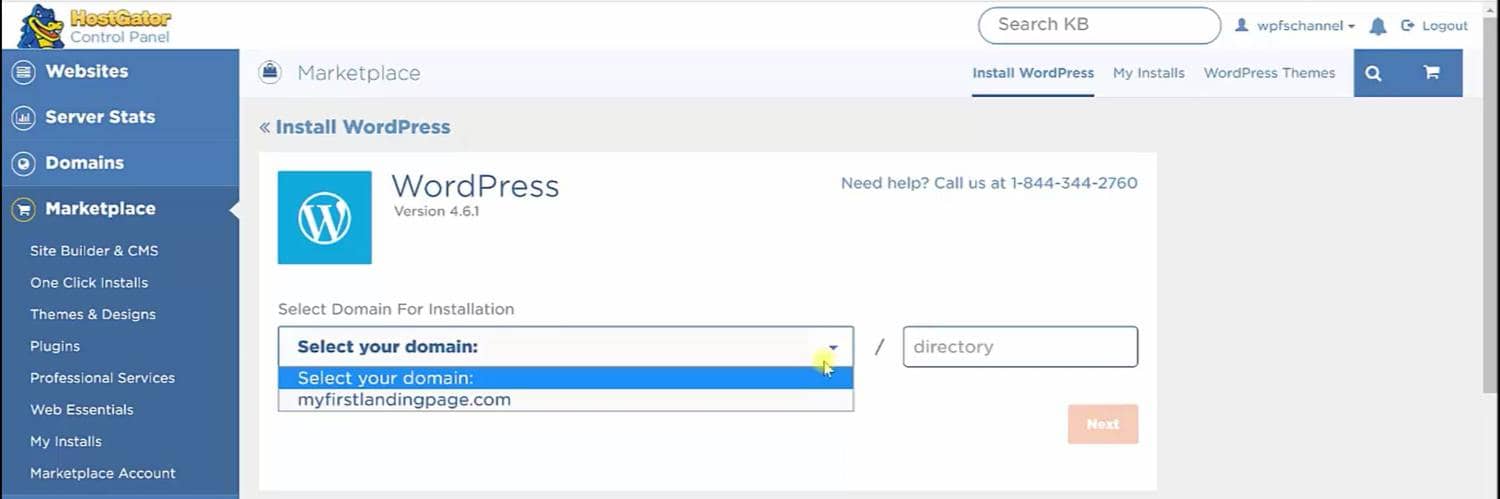
On the next screen, choose your domain name from the dropdown list and click ‘next’.
Fill out some more information like your blog title, your name your admin email (your email), admin name (choose any name you would like) and click ‘install now’.
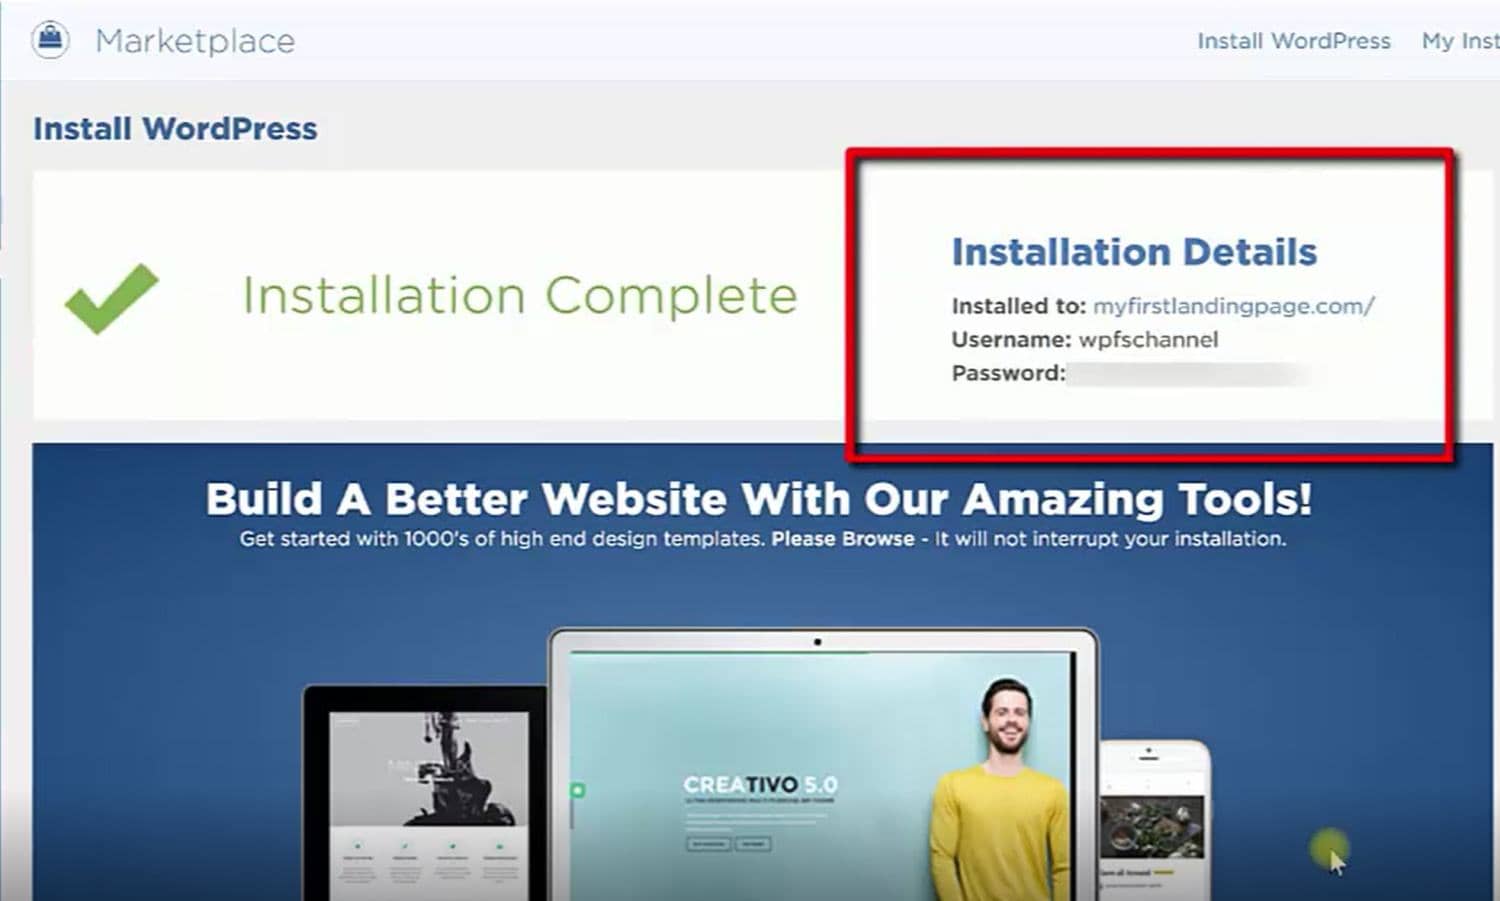
The installation process will start and will take about a minute or two to complete.
After the installation has been completed, you will see your WordPress login information along with the link to your website on the right side.
If your website is offline, don’t panic, it will take up to 3 hours for you site to become active. After it becomes active, you will see a Hostgator page that parking on your domain.
Now, just go to yourwebsitename.com/wp-admin/ and enter your username and password to log in to your backend of your site.
And there you have it! You are in the backstage of your own website / landing page and you can start customize it as you wish.
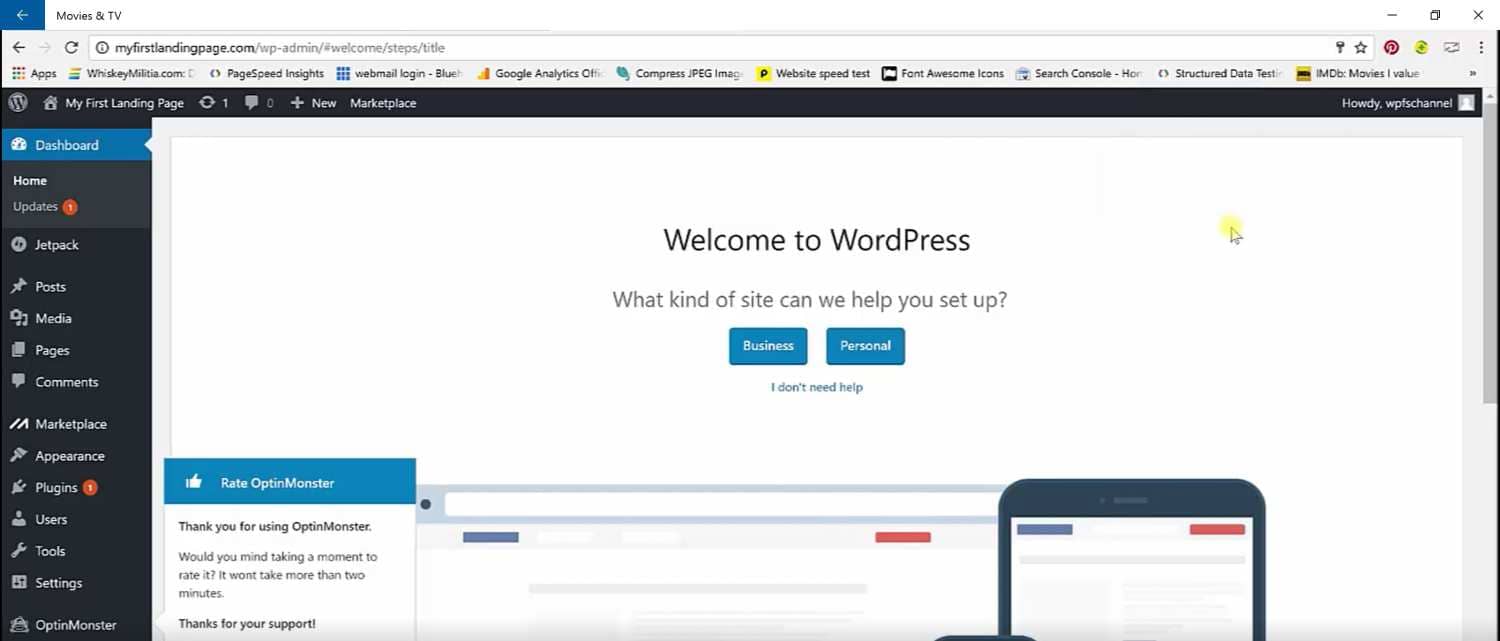
Alright we just finished step number 3. We installed WordPress and now we are about to start step number 4:
Building The Website / Landing page with WordPress
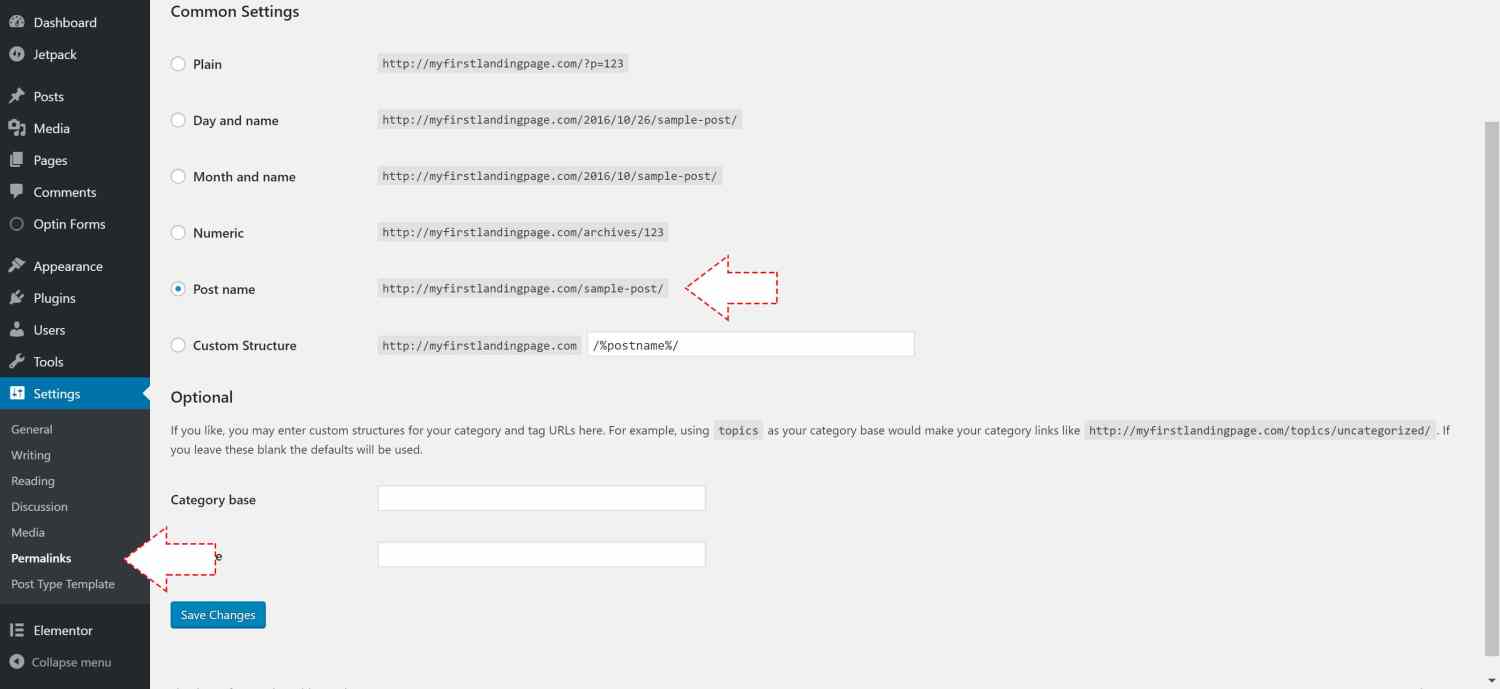
Alright, before we are really going to start building our site we need to change some settings to make our site little bit more accessible by our readers and bot engines.
On the left menu, look for ‘Settings’ and then Permalinks.
On that screen, change the ‘common settings’ to ‘post name’ and click on ‘save changes’.
Now, while still in the setting tab, click on ‘General’ and decide if you would like to add www. to the WordPress Address (URL) and the Site Address (URL). If you did decide to add www. make sure you add it in both of the rows.
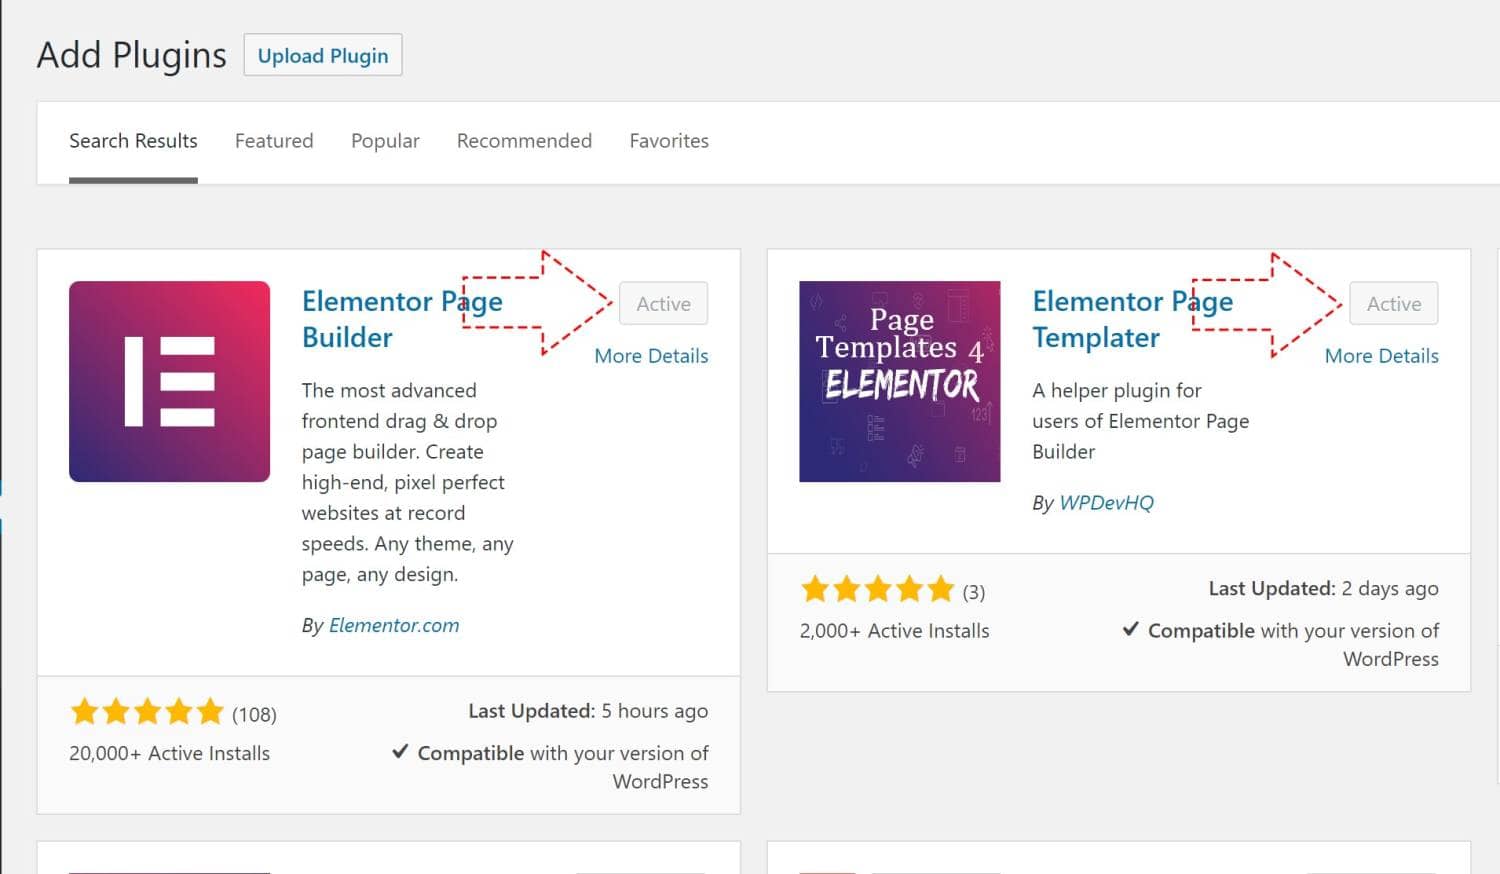
After you did so, click on Plugins on the left menu and then click on ‘Add new’ on the top.
Now we will need to install 6 plugins:
1. Elementor by elementor.com
2. Elementor Templater: ElemenTemplator by WPDevHQ
3. Contact form 7.
4. Child Themify.
5. TJ Custom Css.
Install these six plugins and activate them.
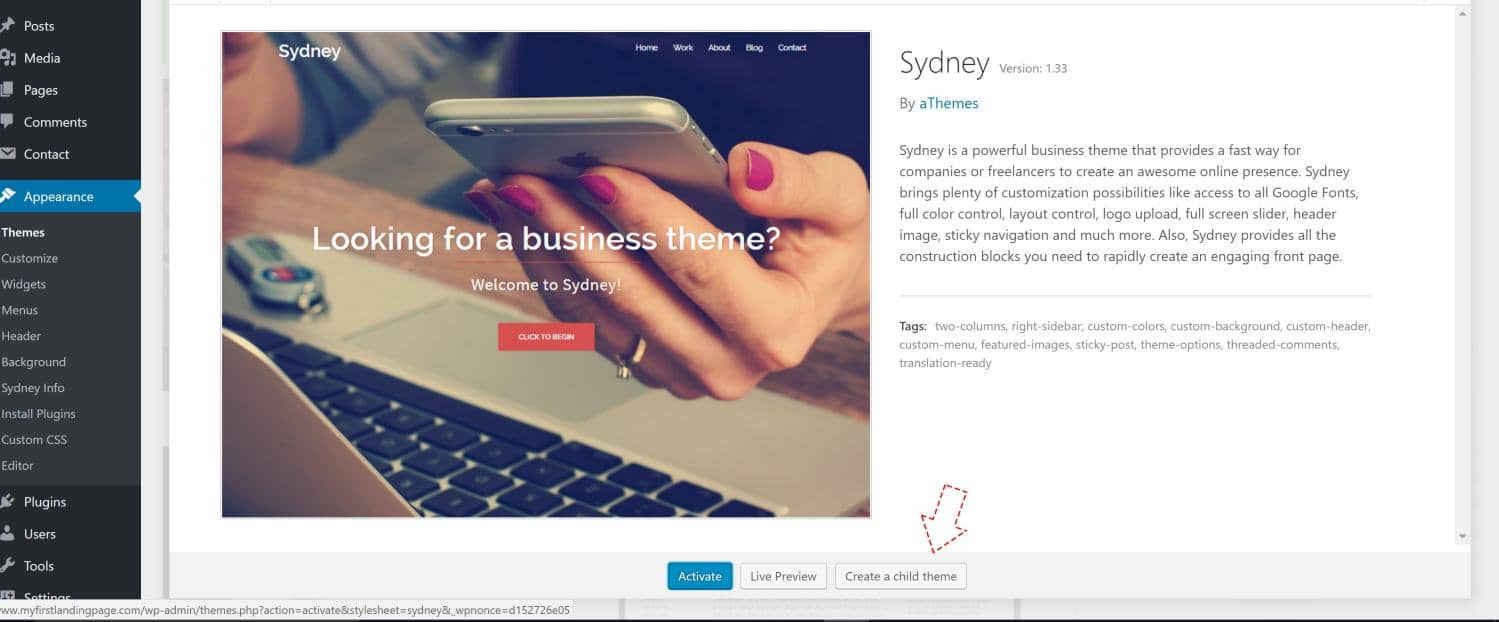
Step 4: Create a Child Theme
We have everything we need to create a child theme. we have the Sydney theme (or any other theme) and we have the plugin ‘child themify’.
1. Go to Appearance -> Themes.
2. click on your Sydney theme (or any other theme you desire).
3. Click on create a child theme on the bottom right corner.
4. Name it and click save.
5. Activate your child theme and visit your site to make sure it’s exactly the same.
After creating a child theme, you will be able to update the parent theme without loosing the changes that been applied to the child theme.
Step 5: Create Pages
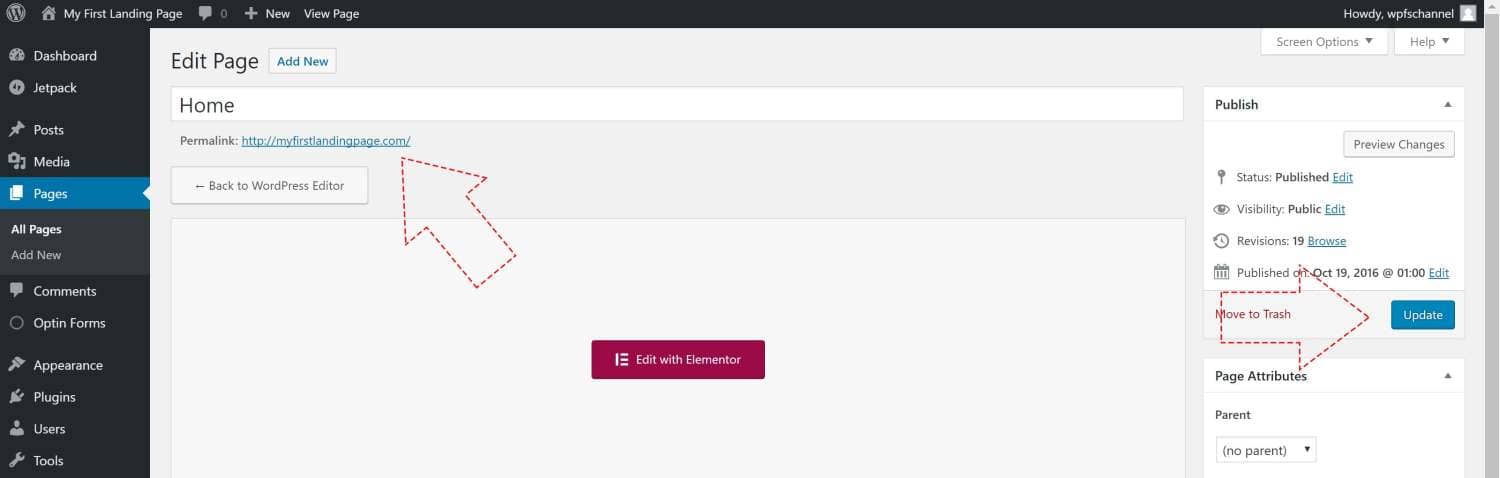
The next step is to open a new page by going to ‘Pages’ on the left menu and then click on ‘Add new’ on the top.
We will call this page ‘Home’ because we will set it to be our home page.
Now, we are going to choose the template for this page. So look for the ‘Page Attribute’ box on the right sidebar of the edit page.
Under ‘Template’ you will see all the default templates that came with your theme along with two new templates that came with the plugin that we installed earlier.
1. Elementor FullWidth Blank will remove everything from the page includes header, footer widgets and sidebar.
2. Elementor FullWidth Standard will remove the widgets and the sidebar but will keep your header and footer in place.
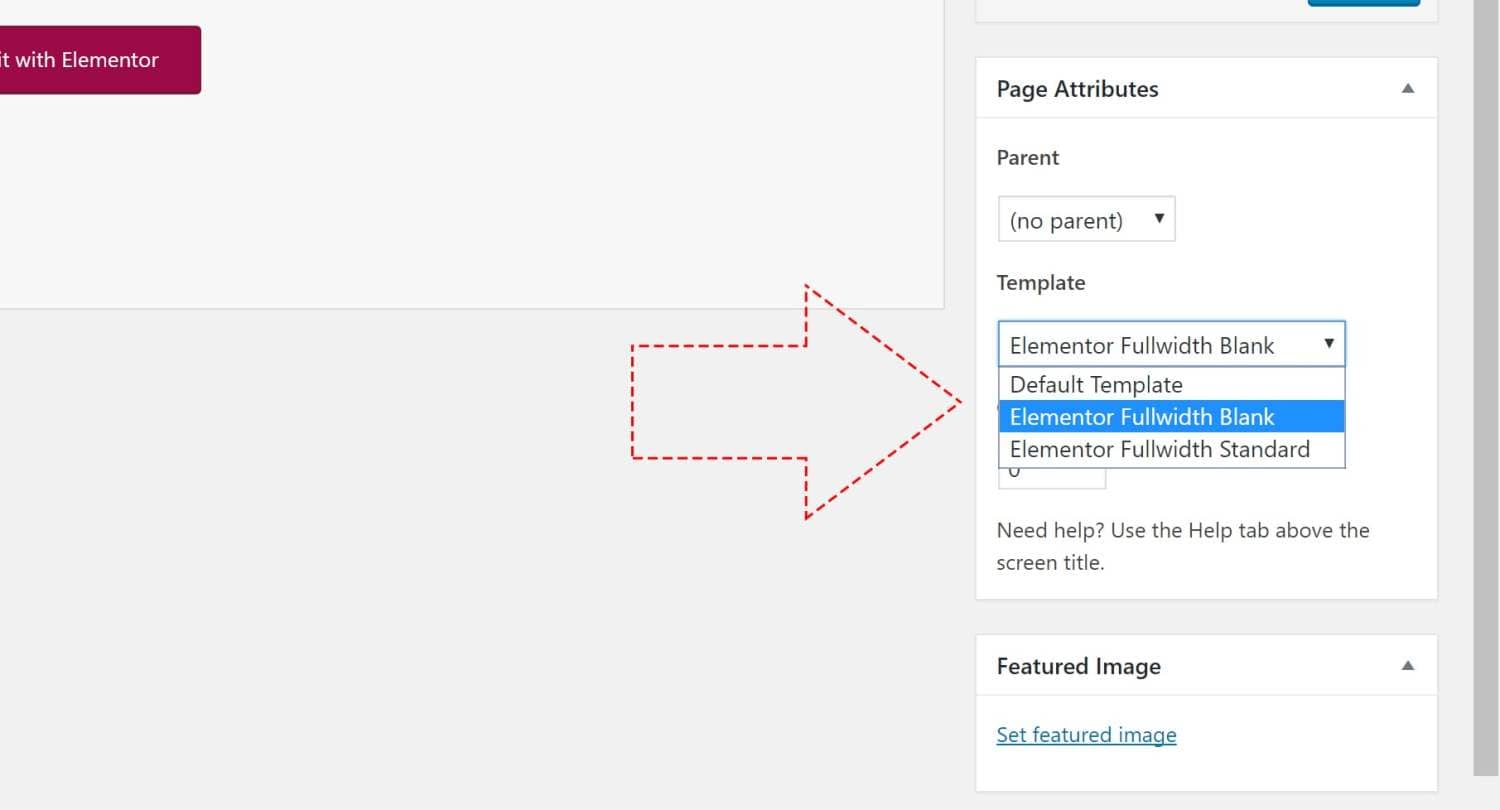
You can decide to use any template you would like.
The nice thing about Elementor page builder is that it’s giving you the option to choose and use any theme that you like.
So you can go to ‘Appearance –> Themes –> Add new’ and browse between all the many themes that they have to offer.
For the purpose of this tutorial I will use ‘Sydney’ Theme.
Ok, After you named the page ‘Home’ and you chose your template (For this use: Elementor FullWidth Standard) click on ‘Publish’ and then visit the page by clicking on ‘View Page’
Great, you published your first page and now we are going to create these pages:
1. About Us.
2. Contact Us.
3. Services.
4. Blog
5. Any other page that you would like.
Step 6: Create Blog Posts
So we have few pages, and now we will create some blog posts.
1. Hover your mouse on posts on the left menu and click on ‘Add New’.
2. Name the post, write the post’s content and give it category (On the right menu).
3. Scroll down and choose feature image to the post (on the right bottom side).
4. Click ‘Publish’.
5. Create more blog posts.
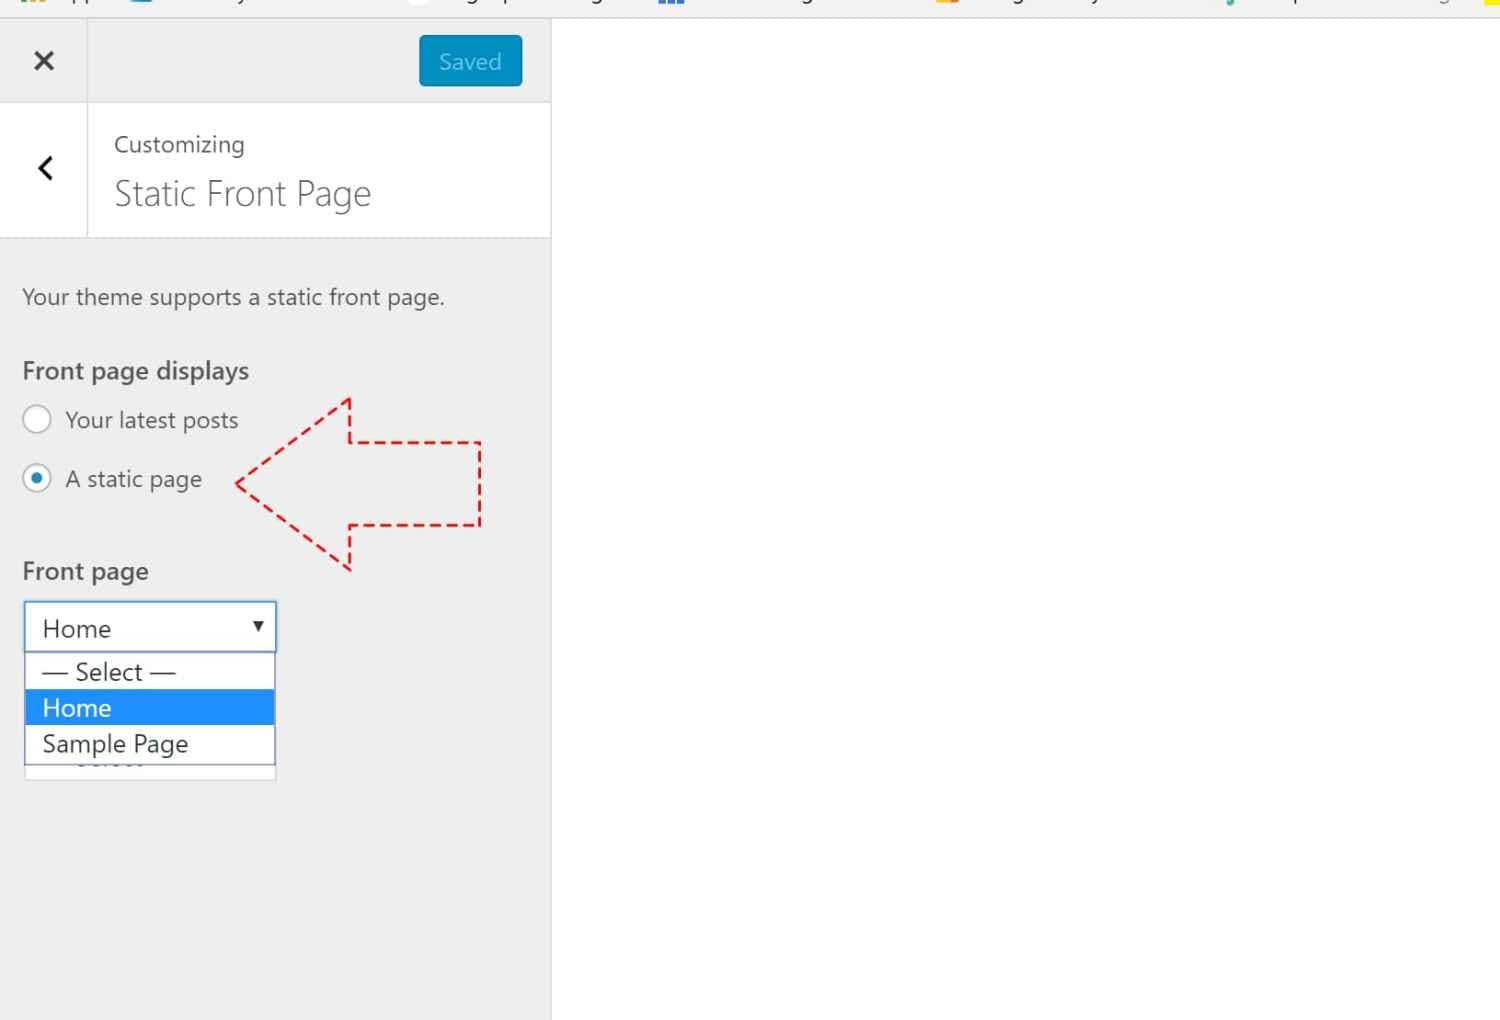
Step 7: Static Front Page
Go to your website home page.
Click on ‘Customize’ on the top WordPress menu and go to ‘Static Front Page’.
Then, check the ‘a static page’ option and choose your home page to be the ‘Home’ page that we have created a minute and the ‘Blog’ page as your recent blog posts page. Click ‘Save and Publish’.
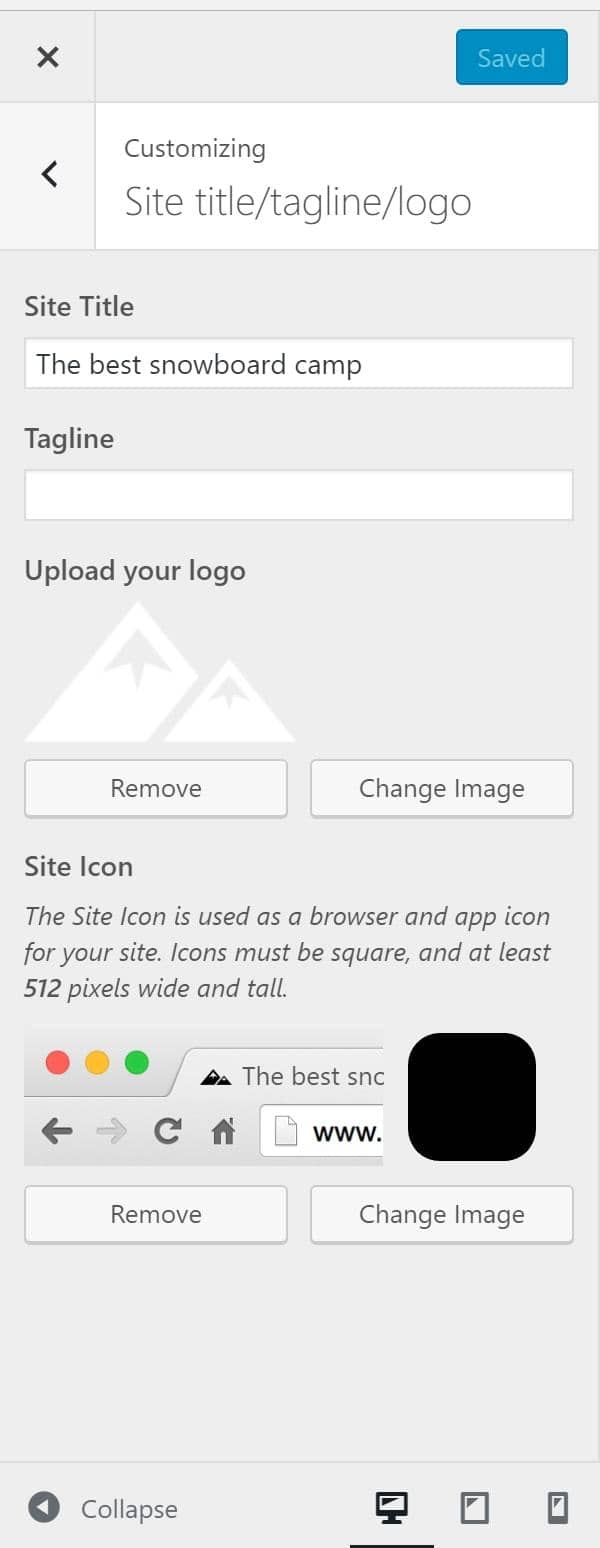
Step 8: Site title/tagline/logo And Creating a Logo
Now, go back to the ‘Customize’ menu and choose ‘Site title/tagline/logo’.
1. Write your Site title and Tag line.
2a. Go to logomakr and search for your graphic from the top left search bar.
2b. Resize your logo to a height of 35px (The width will adjust accordingly) by drugging one of the corners to the center.
2c. Change the logo color to white.
2d. Click save on the top right corner.
3. Upload your logo to
4. Create another version of your logo with a dark color
5. Upload it as your site icon.
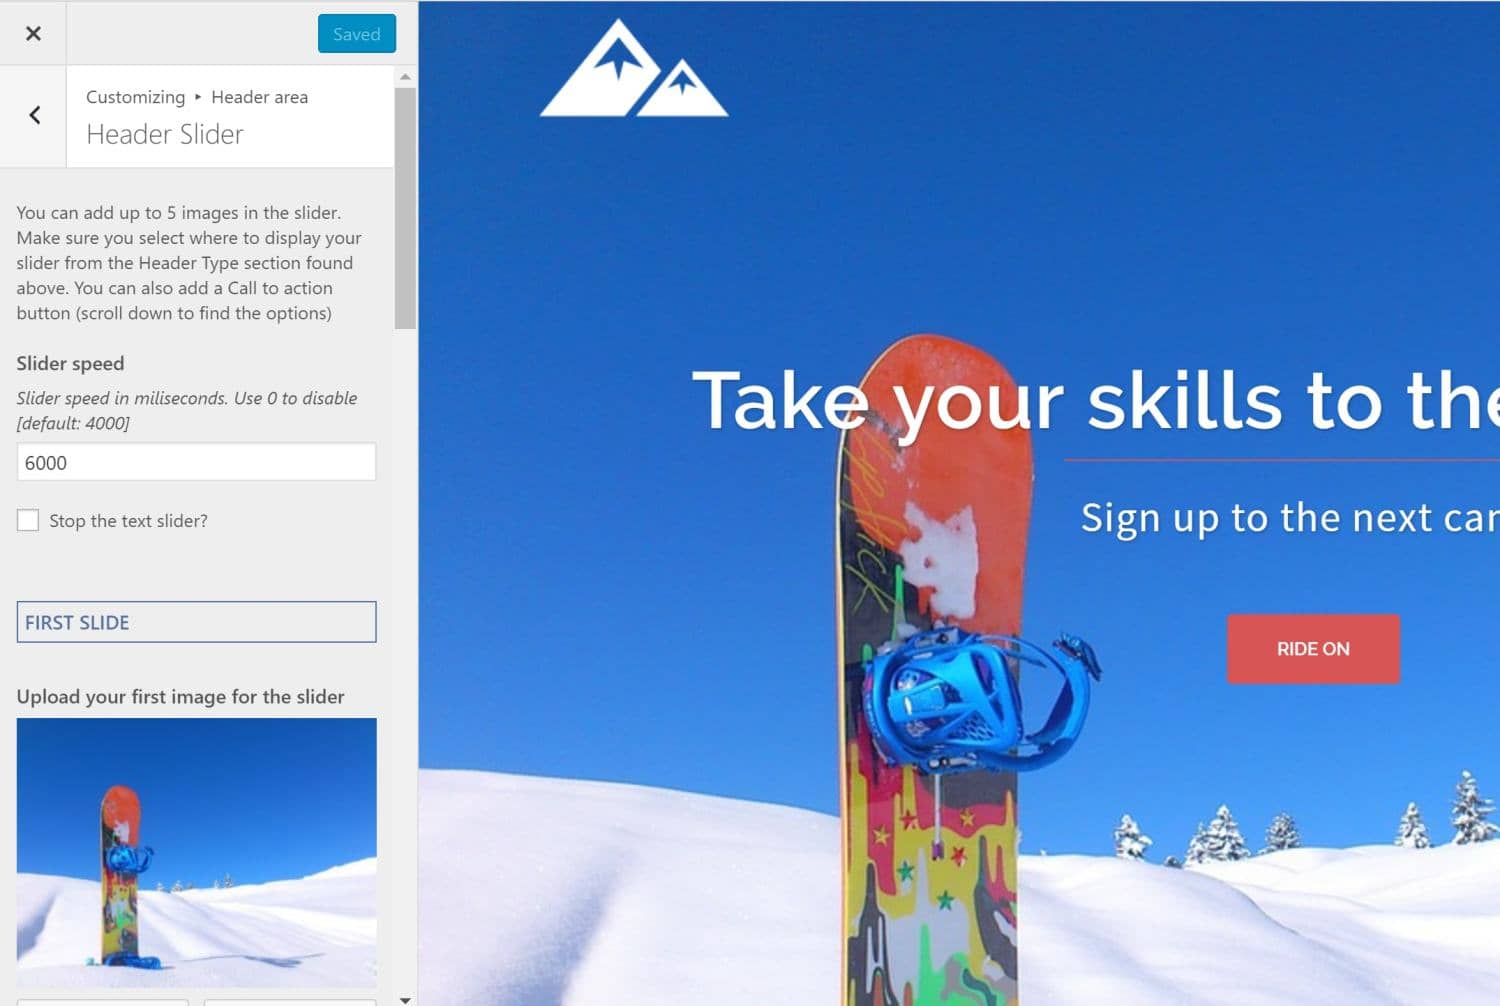
Step 9: Header Area And Slider
After finishing with the website title and logos click back to the customization toolbar and click on ‘Header Area’.
Header type -> Front page header type: Choose Full screen slider and Site header type: No header (only menu).
Go back and choose Header Slider.
1. Change the slider speed to 6000 (6 Seconds).
2. Under First Slide upload your first image for the slider.
3. Under Second Slide upload your second image for the slider.
4. Keep uploading as many images as you wish under the third slider, forth slider and so on.
5. Scroll all the way down and look for the CALL TO ACTION BUTTON.
6. Enter the url where you want the button to link to.
7. Change the text of button.
8. Scroll back up again and click on ‘save & publish’.
Go back again and now choose menu style.
1. Under Sticky menu choose if you would like the menu to be sticky or static. Sticky menu will roll down with you and static menu will stay on top and wont roll down with you.
Click save.
Go back to the customization menu and click on ‘Blog options’
Step 10: Blog options
The only thing here that need to be modify its the Blog layout.
1. Classic will display the blog posts one under another with the sidebar on the right.
2. Full width will display the blog posts one under another without the sidebar on the right (Because it will take the full width of the page).
3. Masonry (grid style) will display the blog posts one next to each other.
You can try all the three and decide which one will look better with your website.
Go back to the customization menu and click on ‘Footer’
Step 11: Footer Options
In the footer area change it to four and click ‘Save & Publish’.
Go back to the customization menu and click on ‘Colors’
Step 12: Website colors
In the colors screen you have the option to change the colors of you website’s general, header, sidebar and footer.
Now it’s just your personal references. Change the colors to fit your logo, your brand and your theme.
Go back to the customization menu and click on ‘Menus’
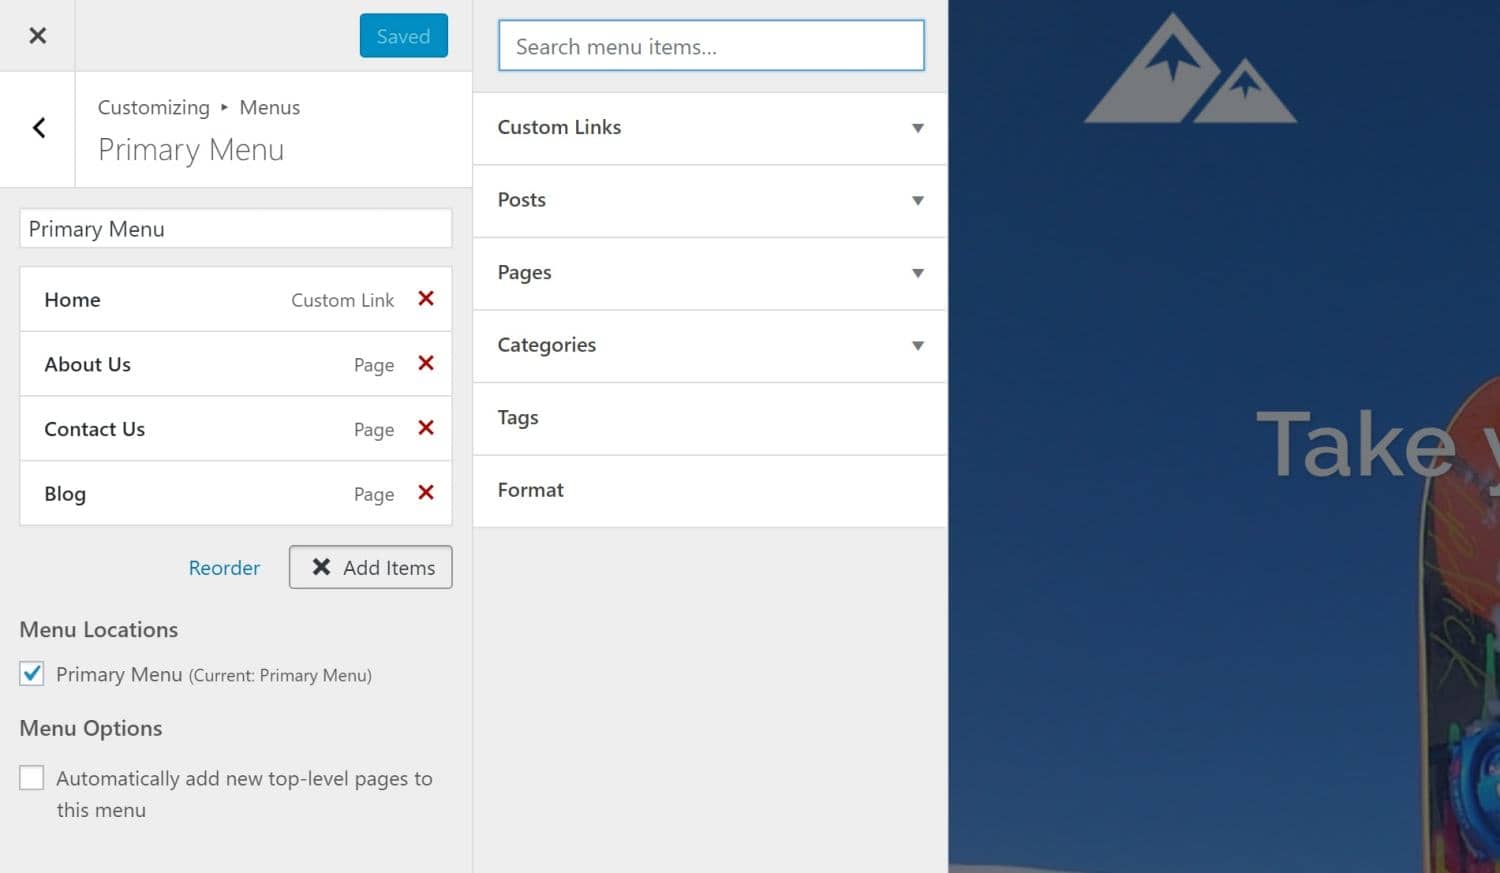
Step 13: Website Menu
1. Inside the menu screen click on ‘add a menu’.
2. Name the menu and click ‘Create menu’.
3. Click on ‘Add items’.
4. Choose pages and select the pages we created on step 5.
5. Under ‘menu locations’ choose primary menu.
6. Click ‘Save & Publish’.
Go back to the customization menu and click on ‘Custom CSS’
Step 14: Custom CSS
Enter these custom CSS and click ‘Save & Publish’.
.content-wrapper {
width: 100%;
}
.row {
margin-right: 0;
margin-left: 0;
}
.posts-layout {
margin: 0 auto;
}
.single-post .content-wrapper {
width: 1170px;
}
Go back to the customization menu and close it by clicking on ‘X’ on the top left side.
Alright, now visit your home page again and you will see that you have a logo, a menu, a slider with buttons and a footer.
Now it’s a great time to start and build the content of your front page.
Step 15: Build WordPress Website or a Landing Page
Ok, we are done with the basic settings and we are walking towards the main dish, creating your home page with wordpress. Let’s get started.
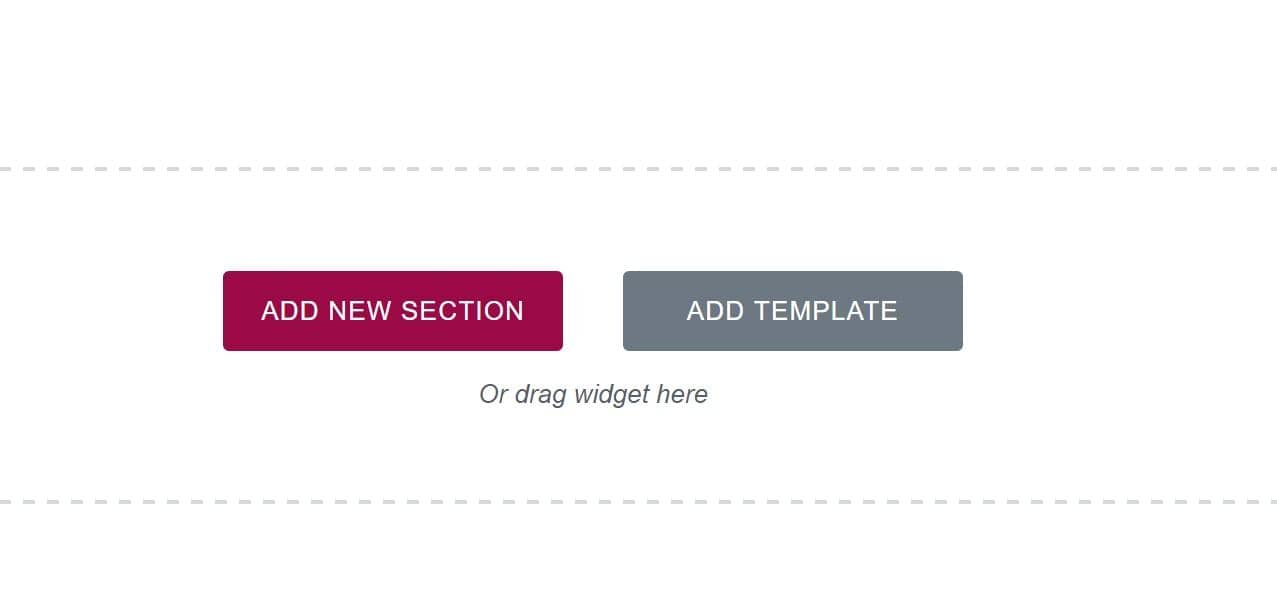
Click on ‘Edit with Elementor’ on the top menu.
Inside the Elementor screen you have two options, ‘Add new section’ and ‘add template’
Feel free to browse between the many templates that they offer you. Look for the one you like the most and insert it.
Now all you need to do is to choose an element from the inserted templates and edit it using the Elementor sidebar on the left.
For example, if you clicked on some text that you would like to change, you will see the edit option on the left.
That way, you can jump from section to section and customize the text, the images, the background colors and etc.
You will see that using the templates you can create your landing page in no time, treat it like a sandbox, play with it, change it and customize it. If in the end you don’t like the results, do it over again, it’s that easy.
But What If I Want To Build The Website From Scratch?
So don’t load any template. All you need to do is to customize it as you wish by clicking on ‘Add new section’ button.
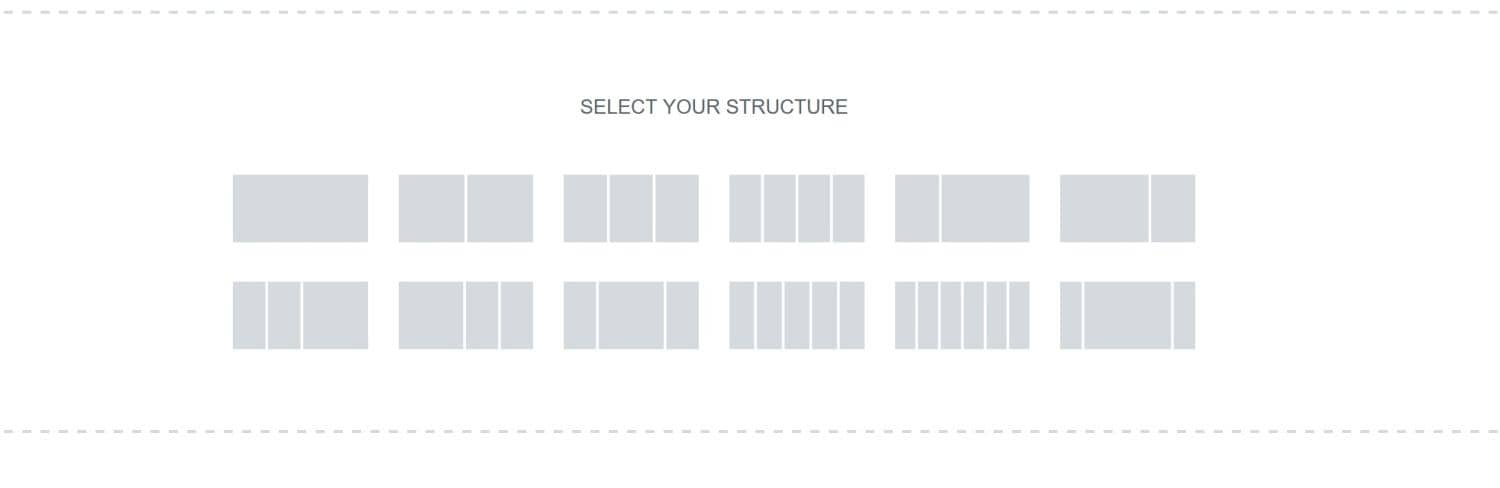
After clicking on it, choose the layout of your new section. Choose between full width, divide it to two or three columns and etc.
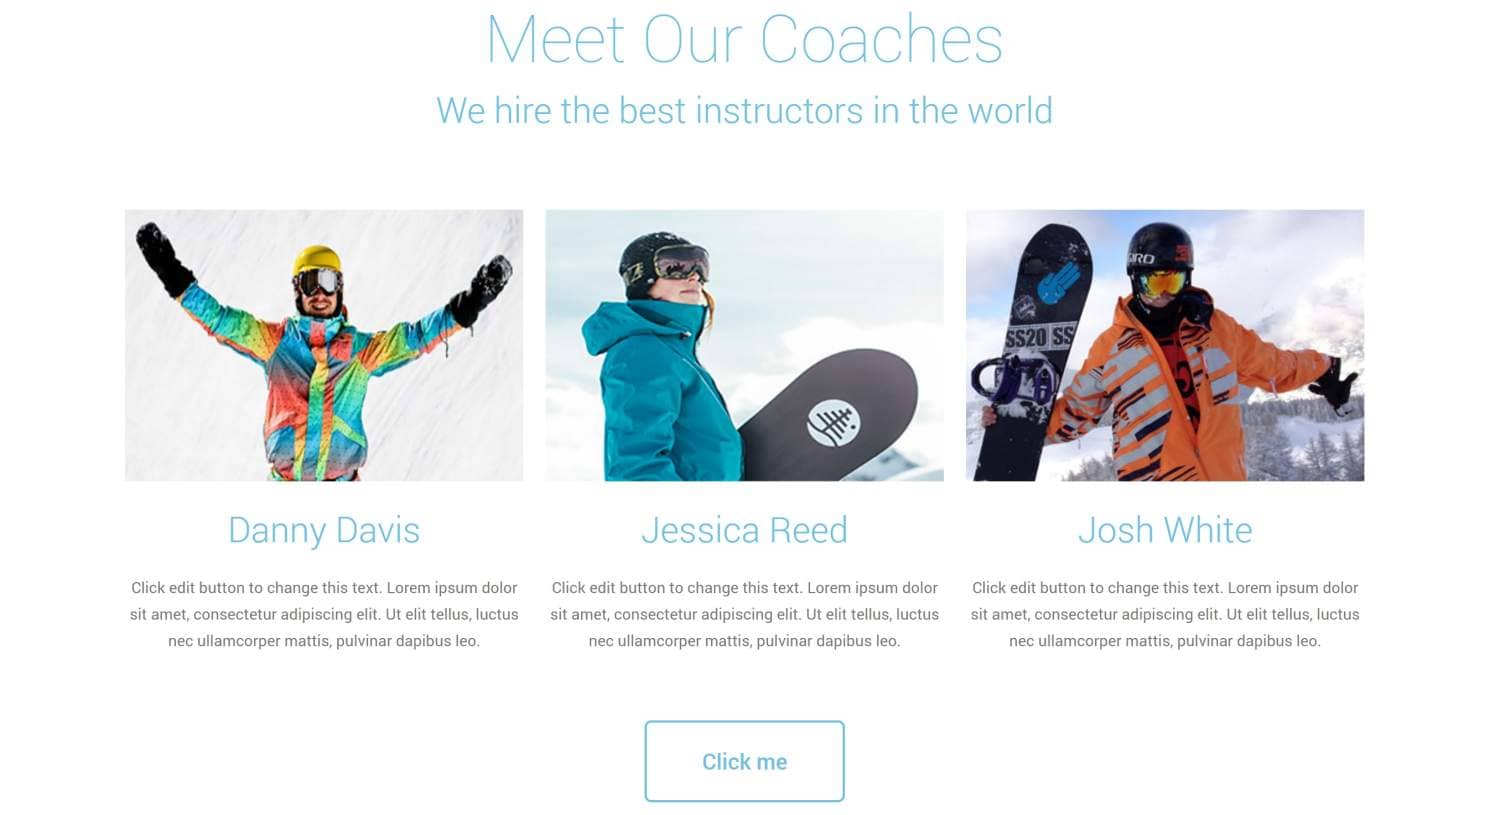
Ok, so we have an header slider and we have a footer, now let’s create our second section which will be the about us section, or in this case, our instructors.
Step 16: Second Section, About Us
Inside the Elementor edit page click on ‘add new section’.
Now, drag the ‘Heading’ element from the right menu to the new section that we created.
1. Write ‘About us’ or ‘Meet our staff’ or any other thing that you would like.
2. Click on the ‘Style’ tab (The middle tab) and style the heading the way you want.
3. Drag another ‘Heading’ element just beneath the top heading element and design it as you wish.
4. Now, drag the ‘Columns’ element under the two titles and divide it to 3 columns.
4. After you created the heading and the sub-heading titles, drag the ‘image box’ element to one of the three columns that we’ve created.
5. Good! Now all you need to do is to write the content for the image box and set the image. You have many options to design it as you wish inside the ‘Style’ tab. Feel free to try and make mistakes, again, it’s like a sandbox, if you made mistakes you can fix it.
6. After you’ve created one awesome image box, duplicate it and drag it to the second column and the third column.
7. Now, when you have three beautiful columns, drag a button (Call to action button) underneath the three columns and change the text to ‘About us’ or ‘Meet the rest of the crew’ or whatever you want.
8. Set the button link to the ‘About us’ page that we’ve created earlier.
That’s it, your about us section is ready and your website start to look more complete now. It’s not that hard to build a website huh?
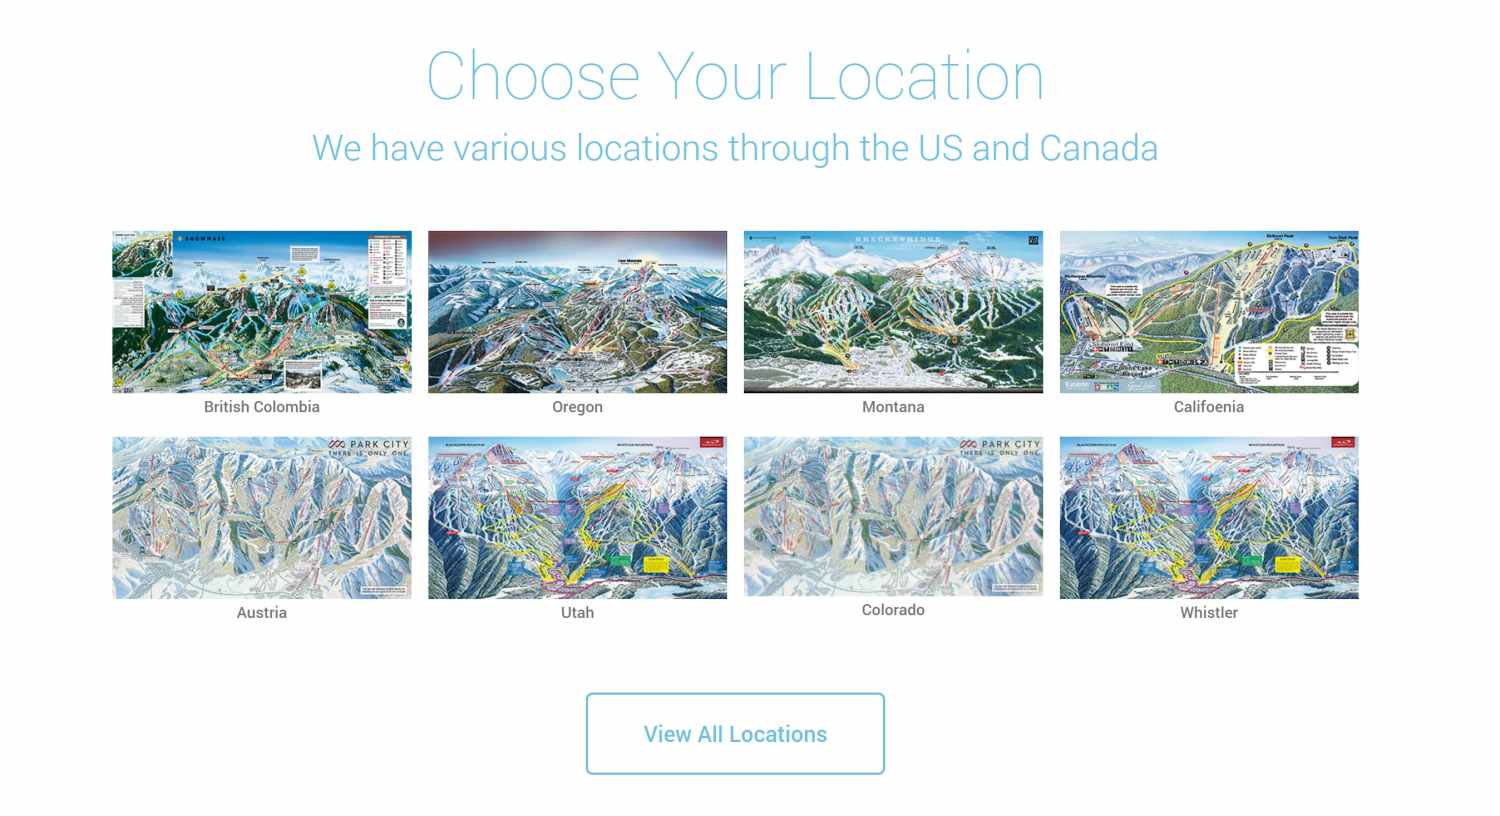
Step 17: Third Section, Image Gallery
Ok, so far we have the header and the about us section. Now we are going to create a gallery section to present our art work or our projects. In our case now I will use the image gallery to display all the locations that our camp operate in.
1. Click on ‘Add new section’.
2. Duplicate the heading and the sub heading of the ‘about us’ section and drag it into the new section.
3. Write ‘Our locations’ or ‘Our projects’ or anything else that fit your website.
4. Drag the ‘Image Gallery’ element from the left elements bar to the new section under the sub-heading.
5. Click on the ‘Add Images’ button and upload images from your computer.
6. Write a caption to each of the images and click ‘Insert gallery’.
7. In the ‘link to’ option choose where to the images will link to when clicking on it.
8. Go to the ‘Style’ tab and set the gap between the images.
9. Feel free to play with the style tab and customize it as you wish. Add border, border-radius, change the captions and etc…
Again, don’t be afraid to make mistakes, you can change it any time or start over.
When you satisfied, save the changes and move to our new section of the website.
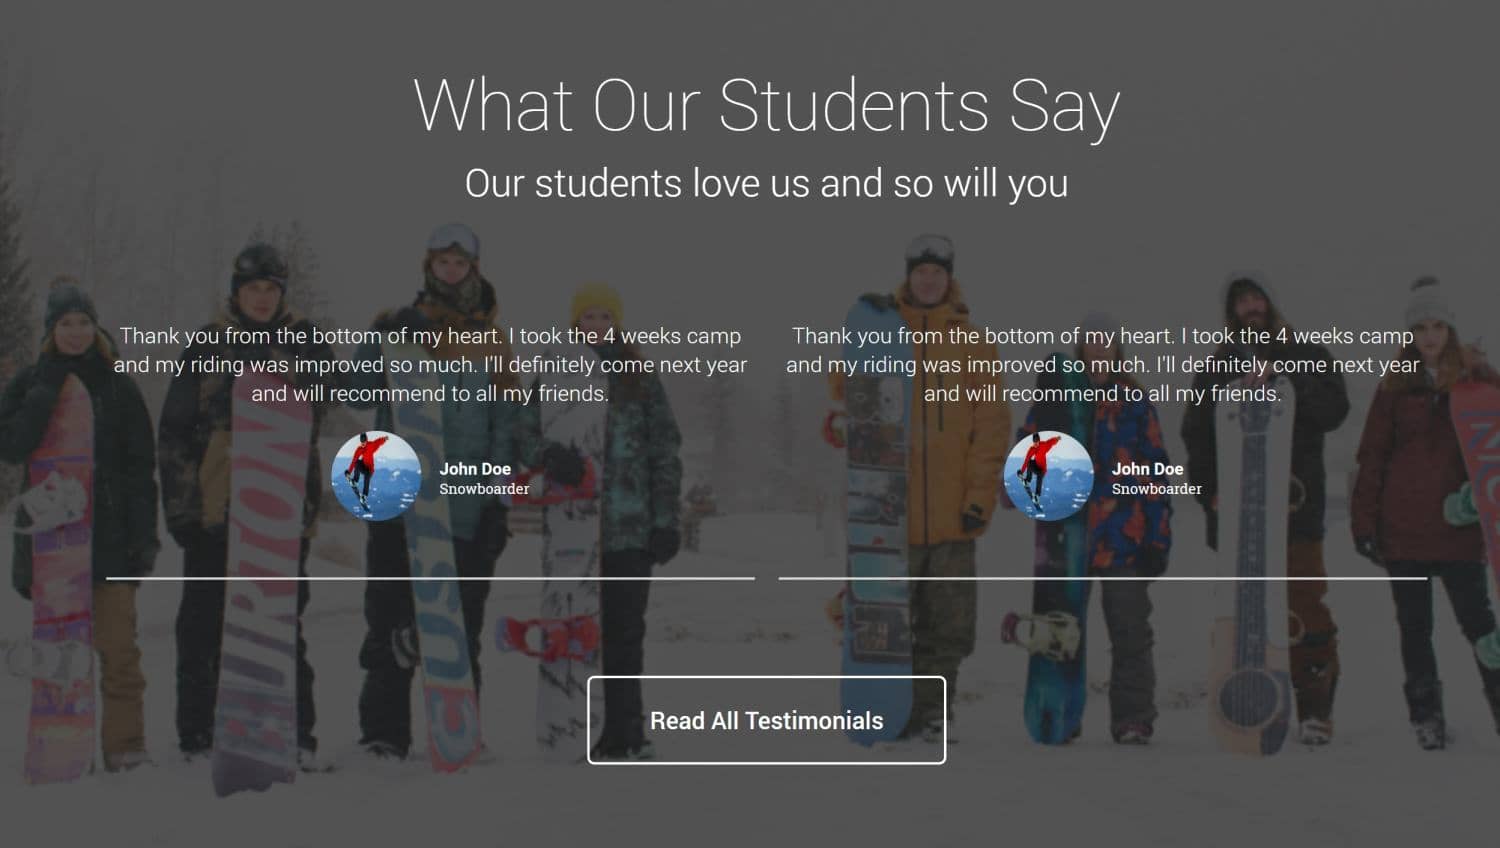
Step 18: Testimonials
Testimonials are necessary in every website, and you website need it too. It will build trust between you and your visitors and it’s a great way to transform your visitor into customers.
1. Click on ‘Add new section’.
2. Duplicate the heading and the sub heading of the ‘Image Gallery’ section and drag it into the new section.
3. Change the heading to ‘Testimonials’ or ‘What others saying about us’ or whatever fits your website.
4. Drag the ‘Columns’ element from the left elements menu and divide it to two columns.
5. Good, now drag the ‘Testimonial’ element to the left column.
6. Write the testimonials, upload an image, edit the writer’s name and his job.
7. When you satisfied with the design, duplicate it and drag it to the other columns on the right.
8. Edit the testimonial, the author, the image and the job for the new testimonial.
9. Duplicate the call to action button from the ‘About Us’ section and drag it to the the testimonial section. Edit the button and change his link.
To change the section background from white to any other color. Hover your mouse on the section and you will see two small tabs on the section top left corner. The tabs are ‘Columns’ and ‘Section’.
1. Click on the ‘Section’ tab.
2. On the left Elementor menu click on the ‘Style’ tab and set the background to ‘Classic’.
3. Change the color of the section to any color that will fit your website.
4. You can even upload a background image to the section by clicking on the ‘+’ icon.
Now this section looks really good right? Let’s keep going to the next section.
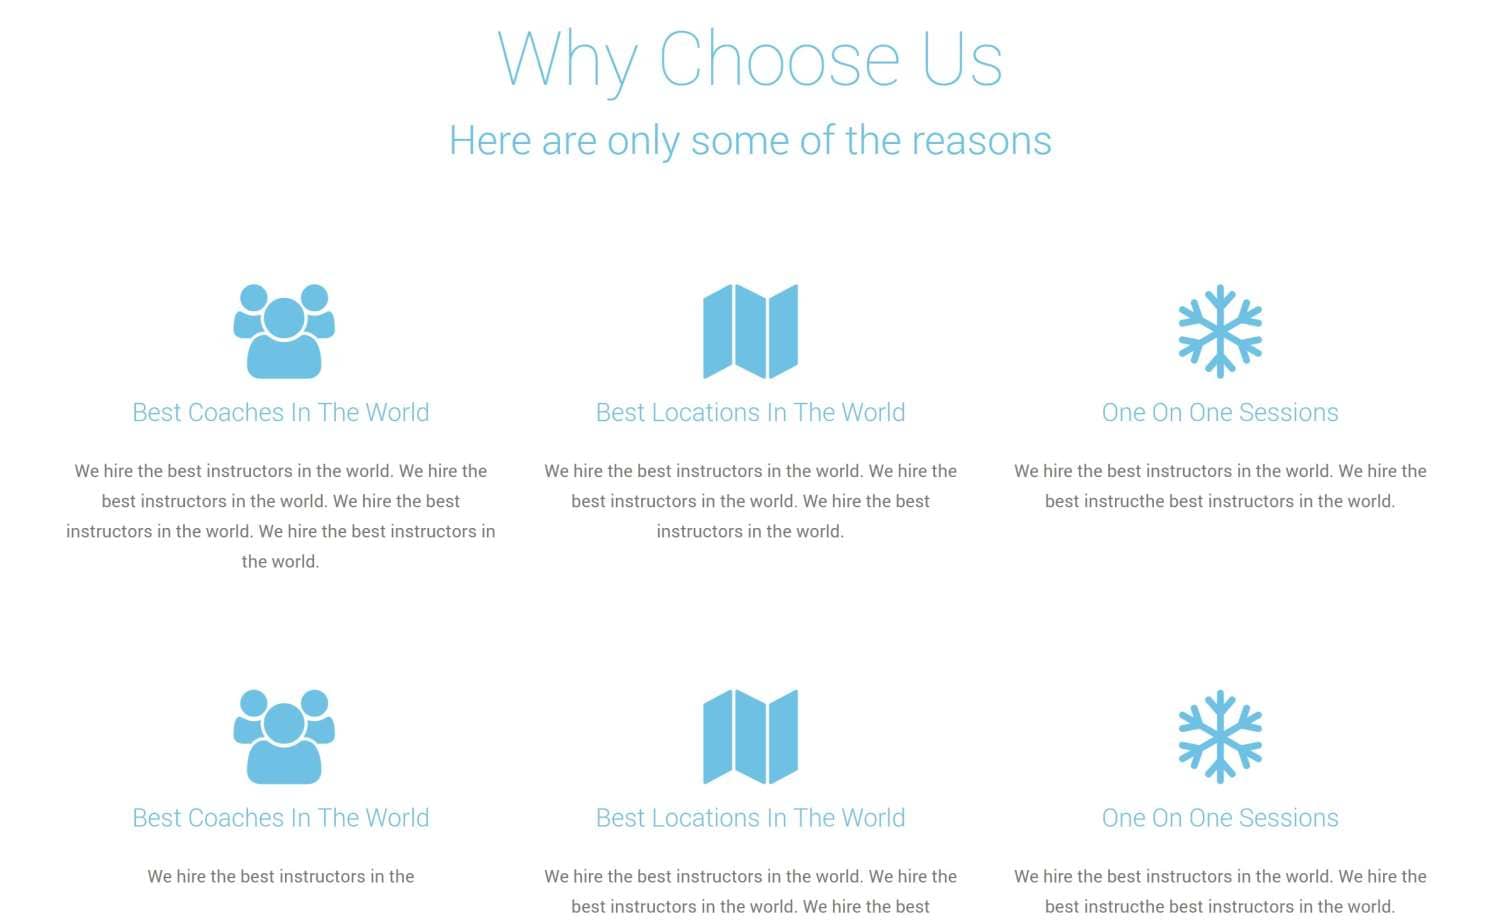
Step 19: Bullet Points
Bullet points are great to emphasize the different between you and the competitor. Why you are good, what good about your service, and basically why they should by from you.
Let’s create beautiful bullet points to your website.
1. Click on ‘Add new section’.
2. Duplicate the heading and the sub heading of the ‘Testimonial3’ section and drag it into the new section.
3. Change the heading to ‘why buy from us’ or ‘why choose us’ or any other text that will fit your website.
4. Drag the ‘Columns’ element from the left elements menu and divide it to three columns.
5. Drag the ‘Icon Box’ element from the left to the first column.
6. Under the ‘Content’ tab choose an icon for this ‘Icon Box’.
7. Write ‘Title’ and ‘Content’ for it.
8. In the ‘Style’ tab, change the icon size, color and etc. You can also change the title and the content size, color, spacing, line height and more.
9. When you satisfied, duplicate the ‘Icon Box’ and drag it to the second column and the third column.
10. Now you have 3 ‘Icon boxes’. if you want to have 6 just duplicate the whole section.
Alright, so now we have completed 90% of our home page, We have the header with the slider, we have the ‘About Us’ section, we have the ‘Gallery’ section, we have the ‘Testimonials’ section and the ‘Bullet Points’ section.
Now, we will deal with the footer.
Step 20: Footer
The footer, unlike the other sections of the home page will not get customized by ‘Elementor’ but through the Appearance -> Widgets screen.
1. Go to your back-end of the website (yourwebsitename.com/wp-admin).
2. Hover your mouse on the ‘Appearance’ on the left menu, and click ‘Widgets’.
3. On the left side you can see your available widgets and on the right side you can see the locations where you can drag the widgets to.
4. Drag the ‘Recent Posts’ widget from the left to the ‘Footer 1’, name it and click save.
5. Drag the ‘Custom Menu’ widget to the ‘Footer 2’, Name it and select the menu that we’ve created earlier.
6. Drag the ‘Search’ widget to the ‘Footer 3’ and give it a title.
7. Drag the ‘Text’ widget to the ‘Footer 4’ space, give it a title and write your office hours and locations, or any other information that you would like to.

You can drag more then just one widget to every footer space. You can have as many widgets as you wish, just drag them one on top of each others.
Great job! Now your front page of your website is perfect and complete. We can continue to the next pages of our website.
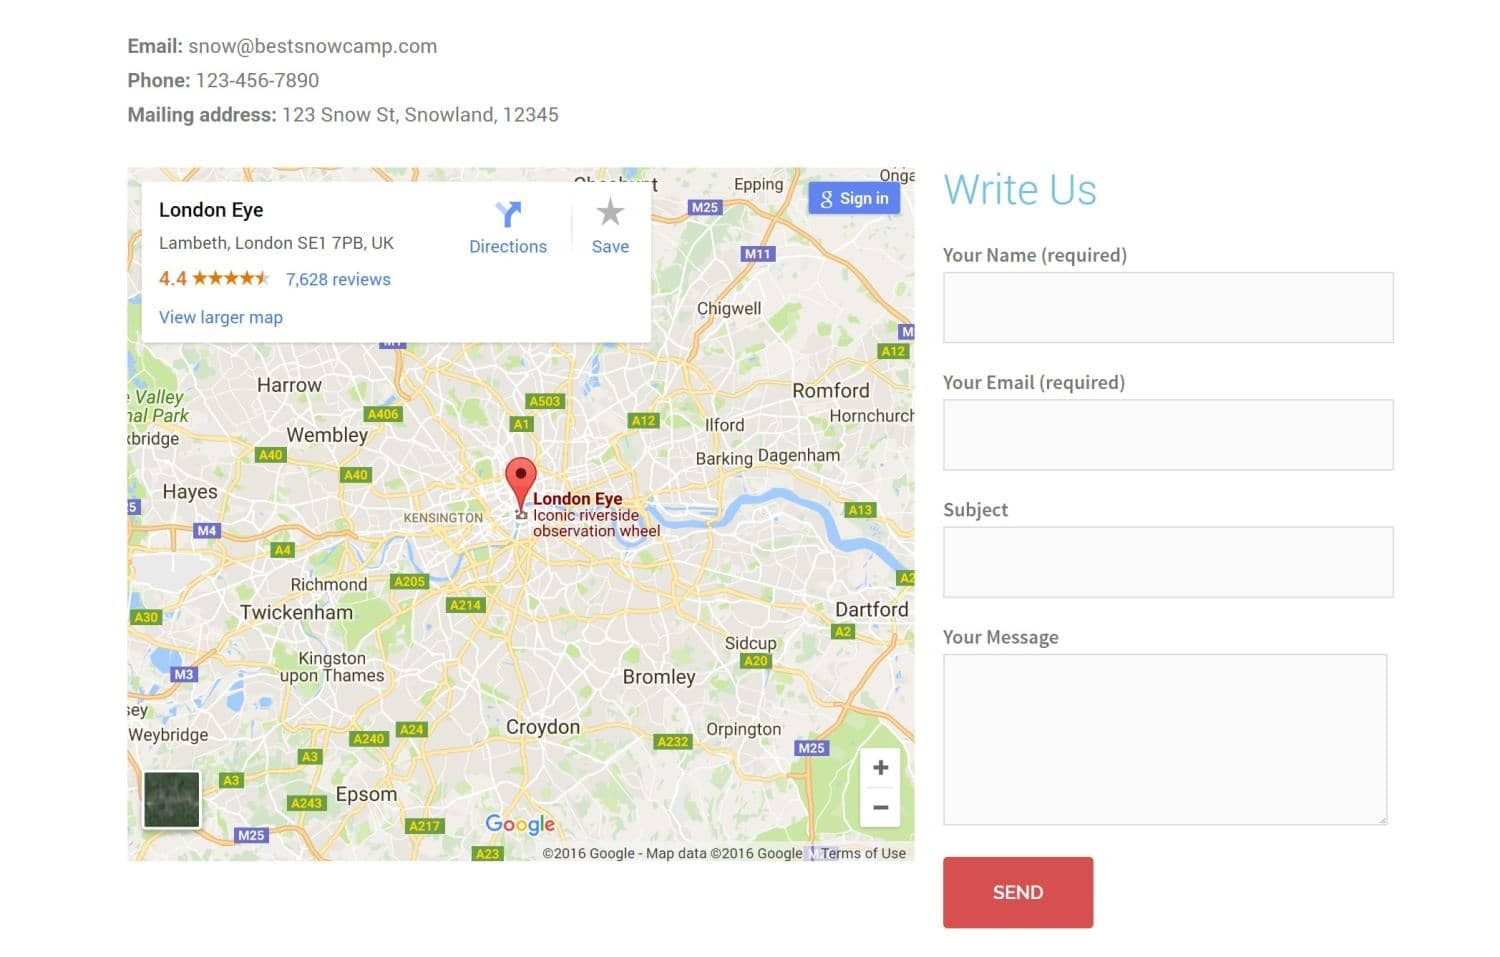
Step 21: Contact Us Page
Alright, so you have a website and you have a stunning front page. But your website is not completed without the contact us page and a blog page. That is what we are going to create next, And we will start with the contact us page.
Ok so we already created a contact us page, now we just need to edit it. So go to the edit screen of the contact us page and set the template (under page attribute) to Elementor fullwidth standard. Click save and then click on ‘Edit with elementor’.
In the elementor edit screen click on ‘add new section’ and then drag the ‘text editor’ element to that new section.
Write:
Email: your email address.
Phone: your phone number.
Mailing address: your address.
Now, drag the ‘columns’ element under the ‘text editor’ element and divide it to two columns of 50% each.
Drag the ‘Google Maps’ element from the left to the the first columns on the left. After you did so, you will be able to edit the location of your physical address in the Google map element. You can also edit the zoom level and the height of the map.
When you done with the map, drag the ‘Shortcode’ element from the left to the right empty column.
Then you will need to enter a shortcode to display a contact form for users to contact you.
Earlier during this tutorial we downloaded the ‘Contact Form 7’ plugin and that plugin will create the contact form for us.
1. Go to the admin panel of your site (yousitename.com/wp-admin).
2. Click on ‘Contact’ from the left menu and then on ‘Contact forms’.
3. You will see that the plugin already created a basic contact form and you will also see the form shortcode.
4. Copy the shortcode.
5. Go back to your contact us page and paste the shortcode in the ‘shortcode’ element.
6 After you did so you will see the contact form.
7. Click ‘Save’.
If you would like to edit your contact form, set automatic email responds, add rows and etc. please watch this tutorial
Your ‘Contact us’ page is ready and now you can be and stay in touch with your website visitors. Very good! Let’s keep going.
Step 22: Blog Page
Now, not much left, we already created the blog post page and we defined it to display our recent blog post, all we have left it’s to make sure it’s looking good
Go to your website’s blog page. yourwebsitename.com/blog and click on ‘Customize’ at the top menu.
1. From the customize menu on the left click on ‘blog option’.
2. Under ‘Blog layout’ choose between Classic, Full width or Masonry (grid style). There is no right or wrong, just your personal taste.
The rest of the settings you can keep the way they are and no more modification needed.
What’s next?
Now you know how to build sections, add elements and customize it to your taste.
From now, just keep adding more sections and set free your imagination.
Play with your sections background and make sure you design it with contrast, so it will pop out more. It’s fun, isn’t it?
Worst case scenario, if you don’t like the design, you can delete a specific section or delete everything and start from scratch again. Just click on the settings icon on the top left and choose ‘Delete all content’.
Conclusion
It’s very easy to create and design a website or a landing page toady, way easier than before.
What I showed you in detail above is by far the easiest method available.
It will let you use any theme and you only need to install 2-3 plugins. That’s it.
I know that creating landing pages and websites may be a confusing process so I tried to simplify it as much as possible.
If you still have questions Please let me know down below in the comments section, or email me at support@wproyalty.com and show me your landing page.

This course is amazing, I cant belive all of this for free! I am very satasfaid, and highly recommend it to anyone who wants to get involved in creating websites.